Abduzeedo - graphic design | design inspiration | tutorials - |

- Great Set of Portraits by Rich Pellegrino
- Daily Inspiration #727
- Random Paradises
- Create a Hellboy Poster in Illustrator
- The Perfect Office #73
- Depthcore New Chapter: MIRROR
| Great Set of Portraits by Rich Pellegrino Posted: 24 Jan 2011 06:00 PM PST
It's always a pleasure to see artists revive iconic movies and characters with their art. Rich Pellegrino has been doing that for some time now and in his latest McFly and Doc are back!<!--break--> Gotta love his style! There's a full set of portraits from different celebrities and famous musicians, and at his portfolio you'll find more of these. Don't forget to visit him, and I hope you enjoy these! Cheers. ;) Marty McFly Doc Brown Peter Willy Wonka Jack Billie Holiday Walter Fashionista Ash Musicians |
| Posted: 24 Jan 2011 11:01 AM PST
This post is part of our daily series of posts showing the most inspiring images selected by some of the Abduzeedo's writers and users. If you want to participate and share your graphic design inspiration, just send us, via email, the image with the link from where you found it, also use "Daily Inspiration" in the subject, and don't forget to send your Abduzeedo username; or via Twitter sending to http://twitter.com/abduzeedoIf possible use the HTML code: <p class="imgC"><a href="Link to the page you found the image"><img src="Link to the Image" /></a></p> Do you want to see all images from all Daily Inspirations? Check out http://daily.abduzeedo.comAkomoto
Best Bookmarks
Bruno Ricardo
Chity
coolvibeblog
diego_liv
Dreamz
Edward McGowan
Eric Vasquez
eugene kim
Fabiano
Fabio
fksd
Gisele
Hassan
HdK
Julien Servy
marvelgd
Maurício Cescon
nenuno
Newyorkiz
shelbywhite
Sivioco
Via TwitterSend your suggestions via Twitter to http://twitter.com/abduzeedo using #abdz in the end of the tweet. @theroyaltyclub
@PJ_Tierney
@psdfan
@Marcos333
@daniel_nelson
|
| Posted: 24 Jan 2011 05:38 AM PST
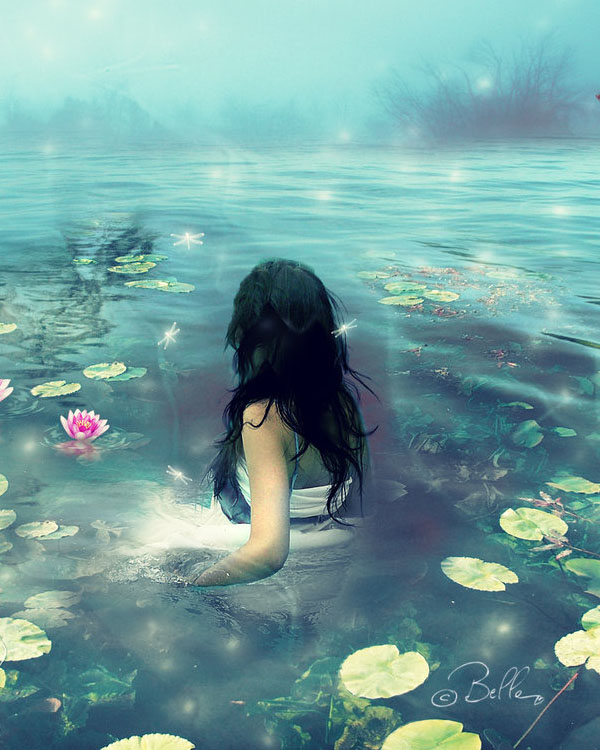
Have you ever wanted to go somewhere where nobody could find you or bother you, a paradise getaway? Well, here is a selection of photos of random paradises, magnificent places from different parts of the globe that I'm sure you would love to go and stay as long as possible.<!--break-->
Which one is your favorite paradise?About the authorHi there! I'm Paulo Canabarro, 25 year old web designer from Brazil currently living in Providence RI, USA. I'm truly passionate about design of all kinds. Finding and sharing inspiration has become part of my life. If you have any suggestions or requests just get @ me - pvpcanabarro@gmail.com For some cool stuff make sure to Follow me on twitter! Sponsored Links:
|
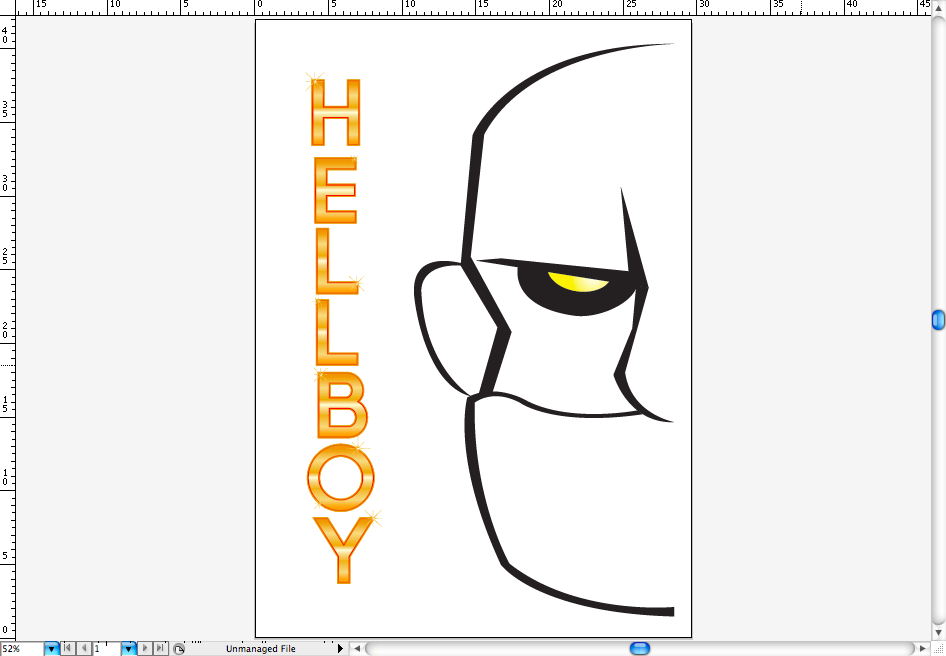
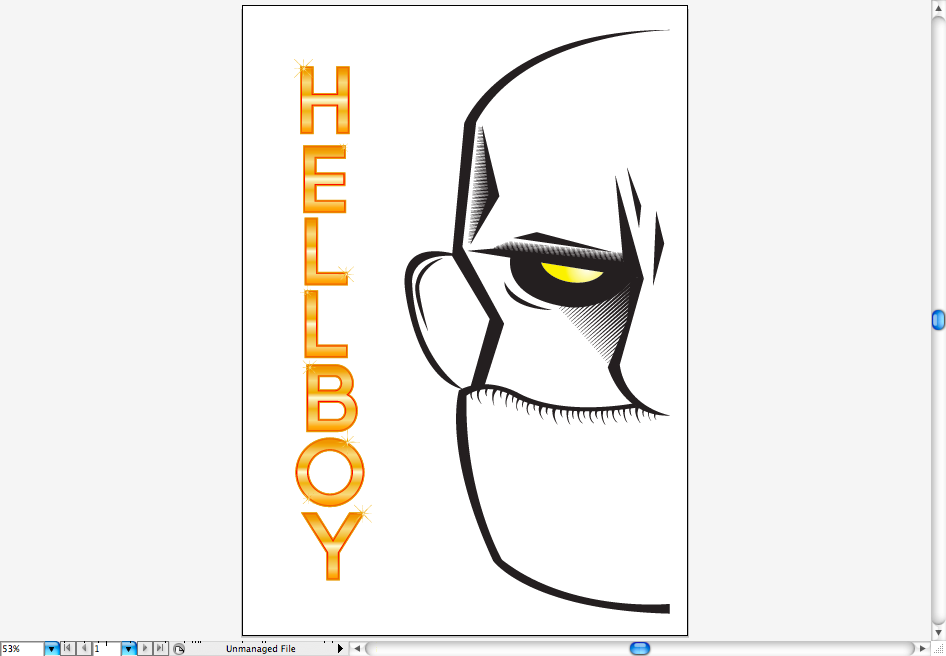
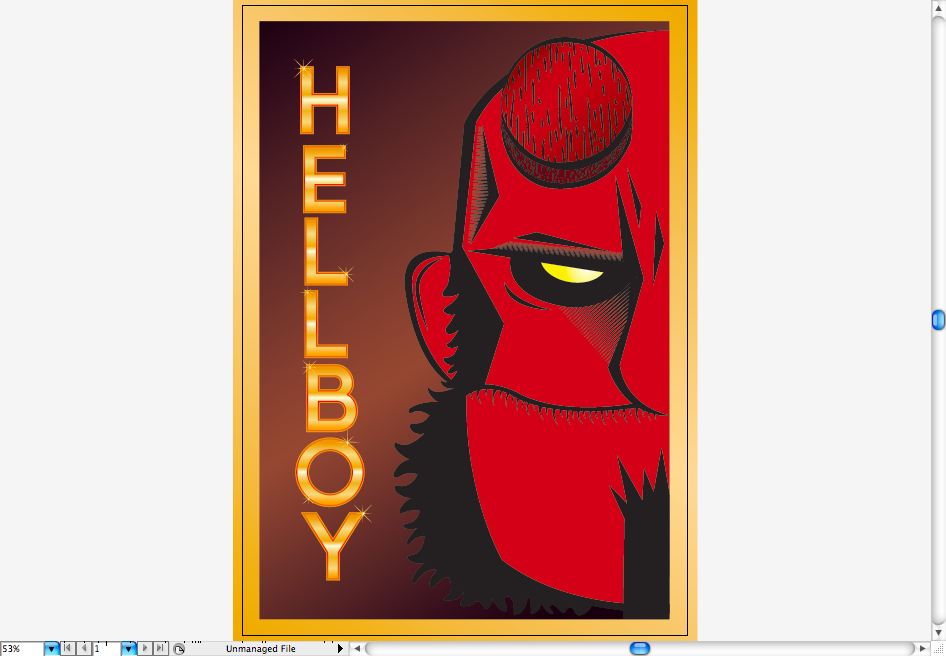
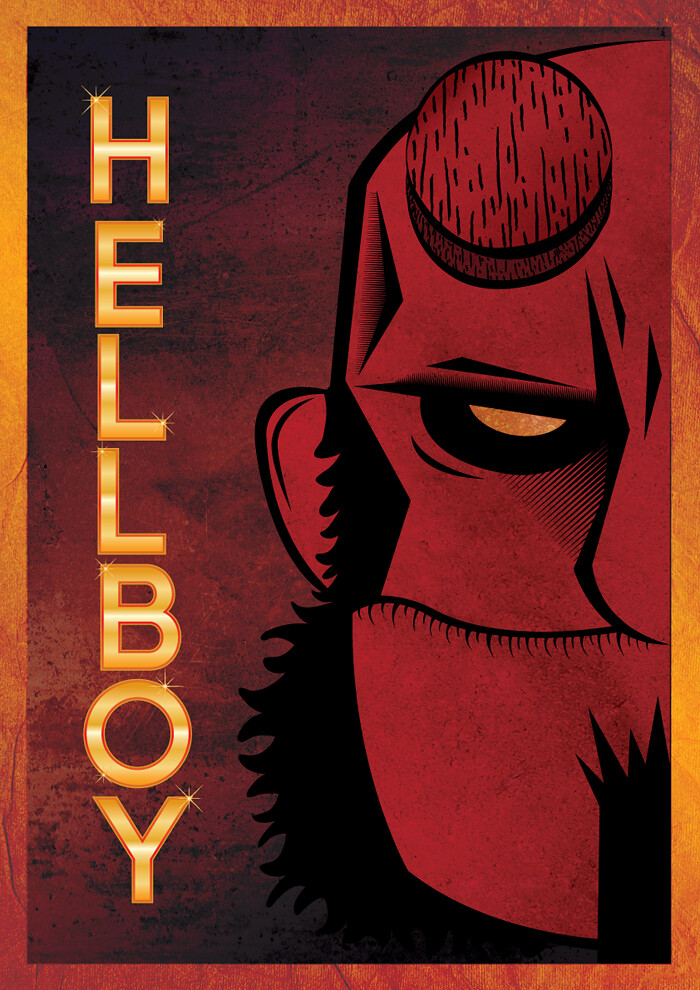
| Create a Hellboy Poster in Illustrator Posted: 24 Jan 2011 05:08 AM PST
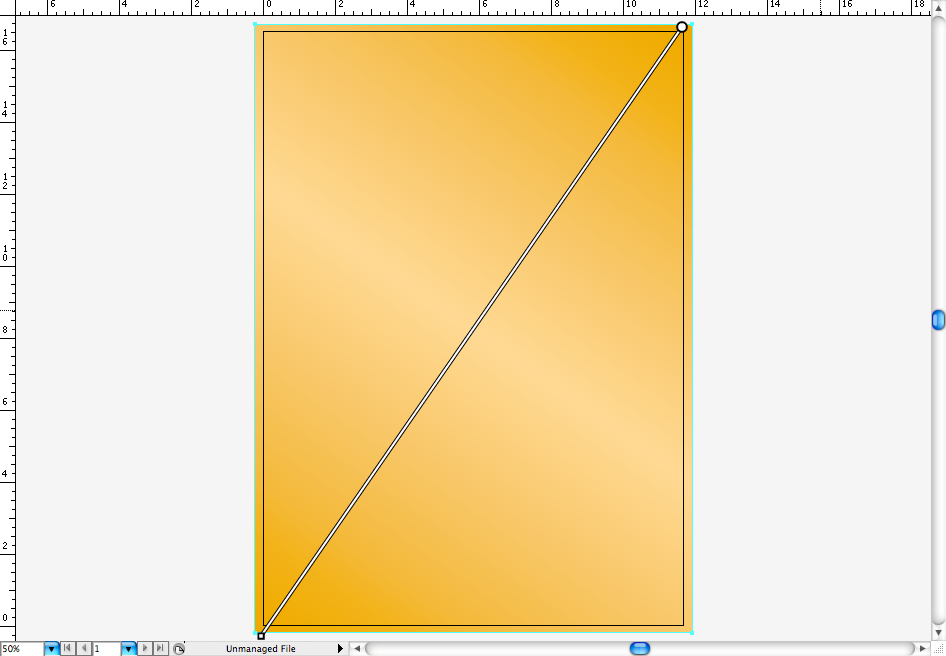
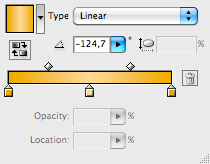
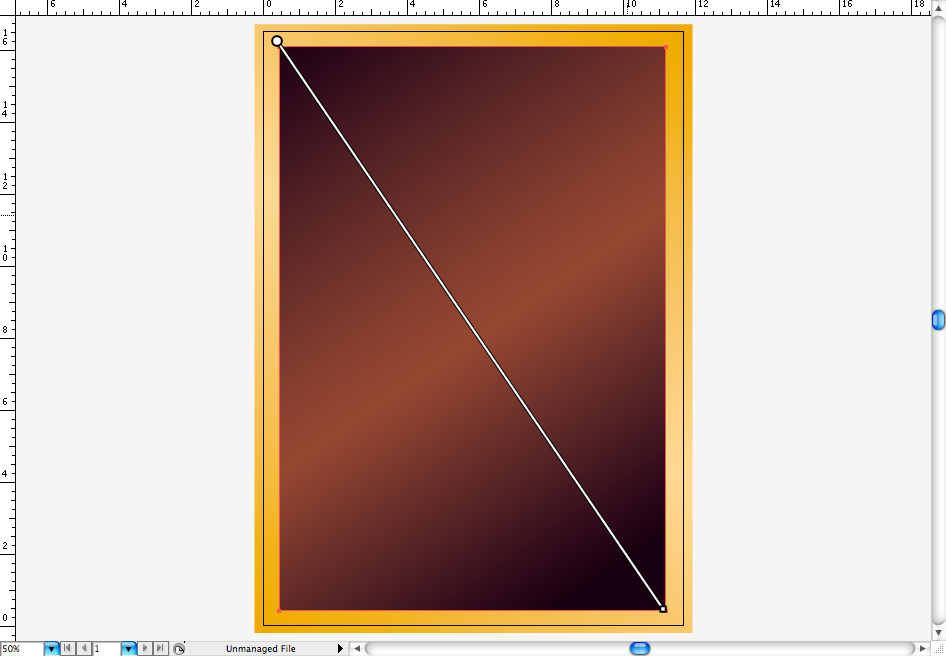
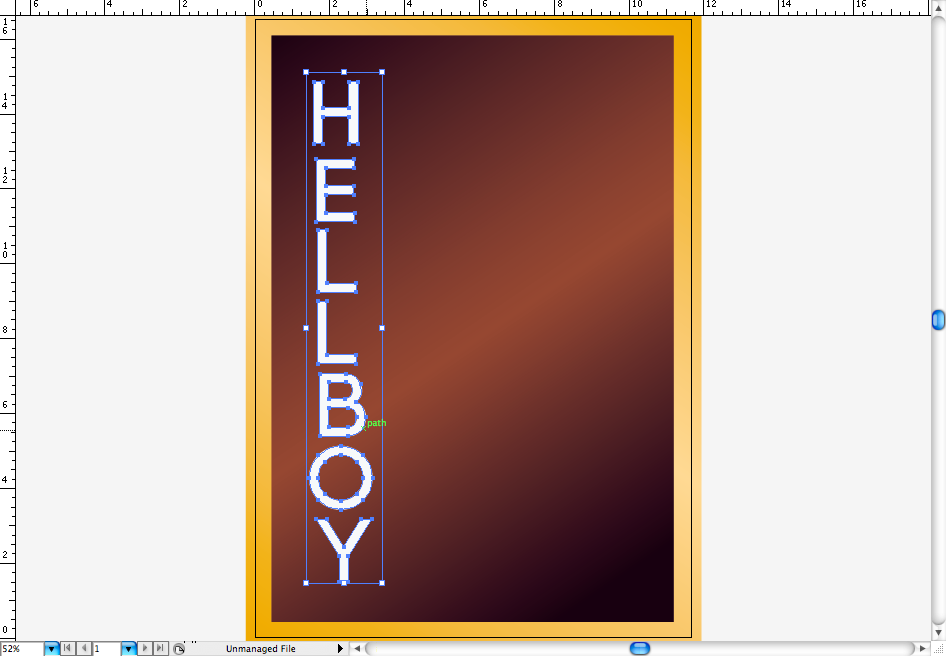
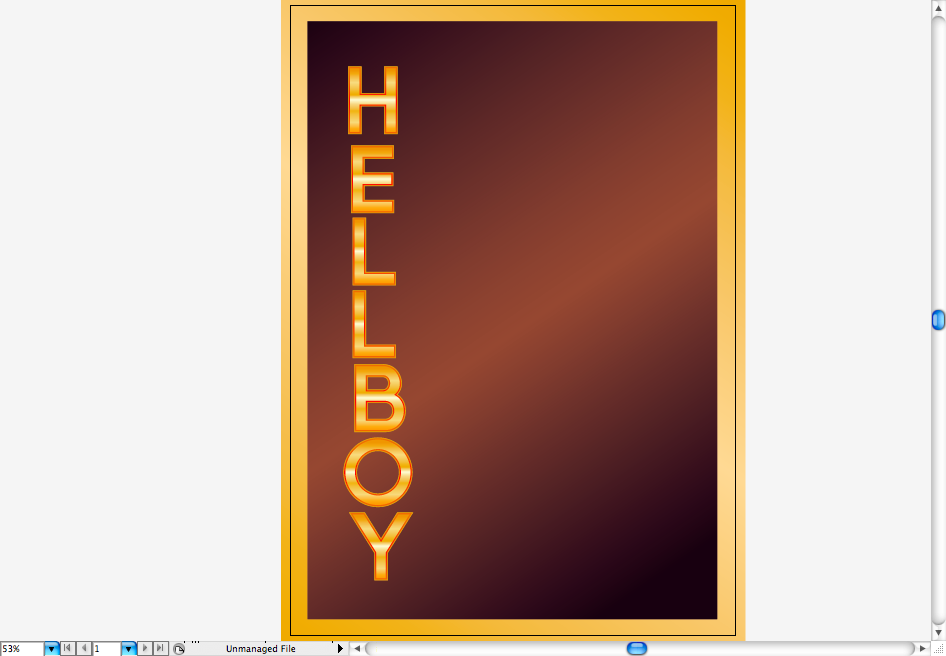
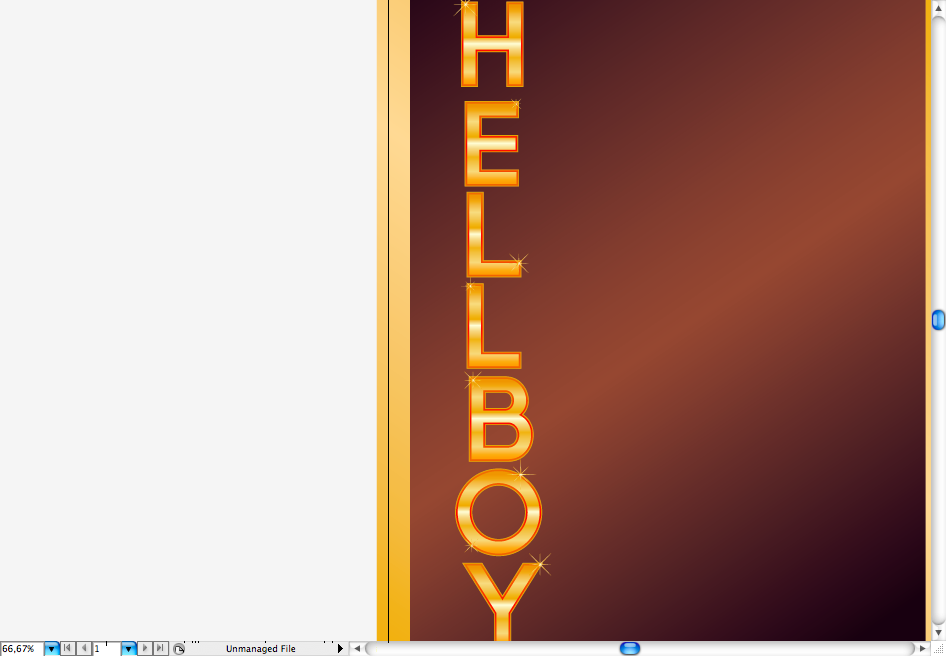
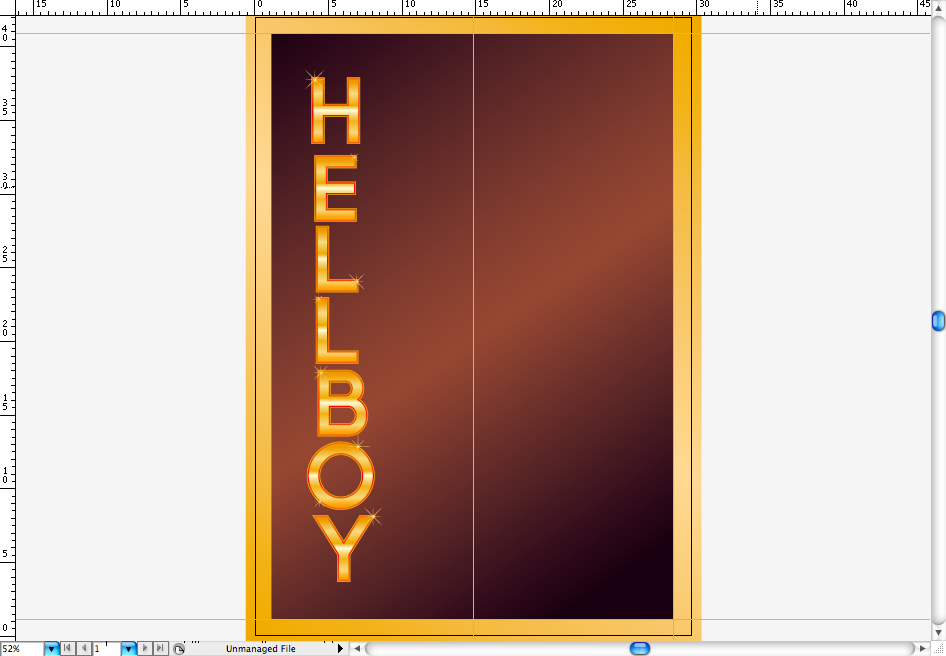
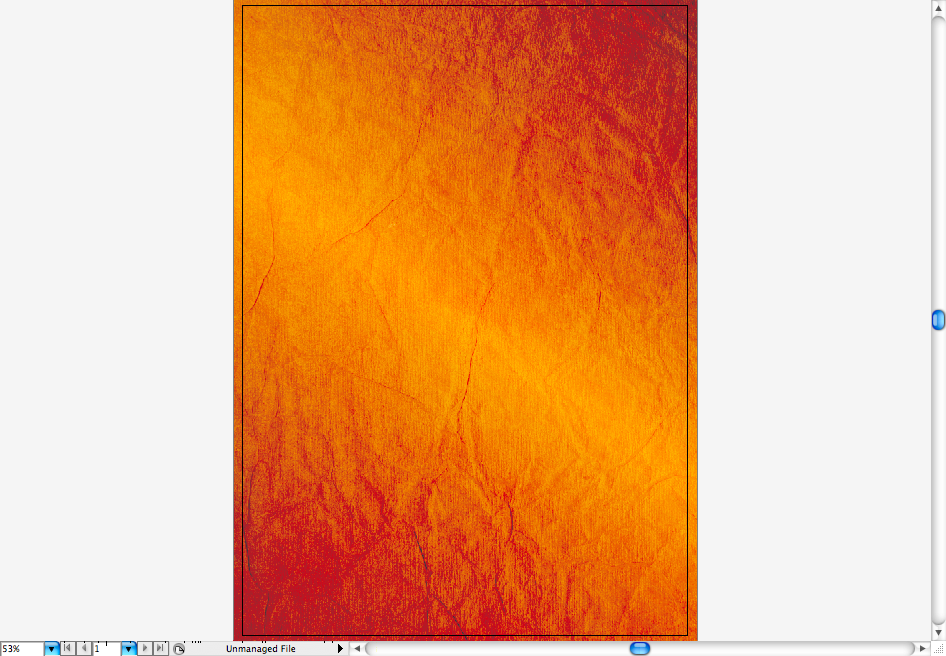
Lately, we received many requests for more illustration tutorials, so for this week we decided to show you how to make this cool hellboy poster in illustrator.Before we begin, I must say this is going to be a more advanced tutorial, you won't need to know how to draw, but with you know it will be a lot simplier. The basic requirements is to be good with the pen tool and blending modes, so let's do it buddies. Step 1Open adobe illustrator and create a A3 vertical canvas (42 x 29,7 cm or 11,69 x 16,54 inches). Using the rectangle tool ( M ) create a rectangle to fill all the canvas and with the gradient tool ( G ) put a golden gradient on it.
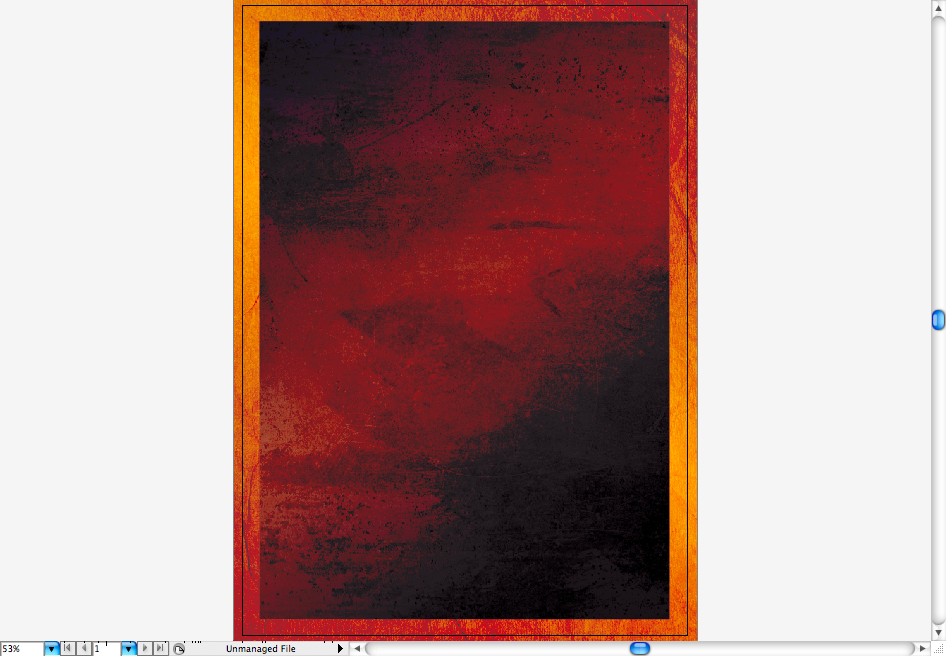
Create a new layer ( ctrl + L / command + L ) and repeat the same procedure, but this time make a rectangle with some distance from the canvas, in order to make the golden border. Using the gradient tool ( G ) create this brown gradient in the opposite direction of the golden.
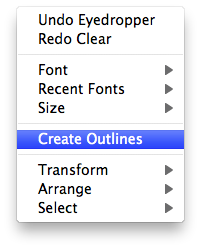
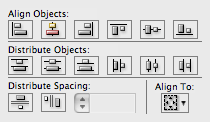
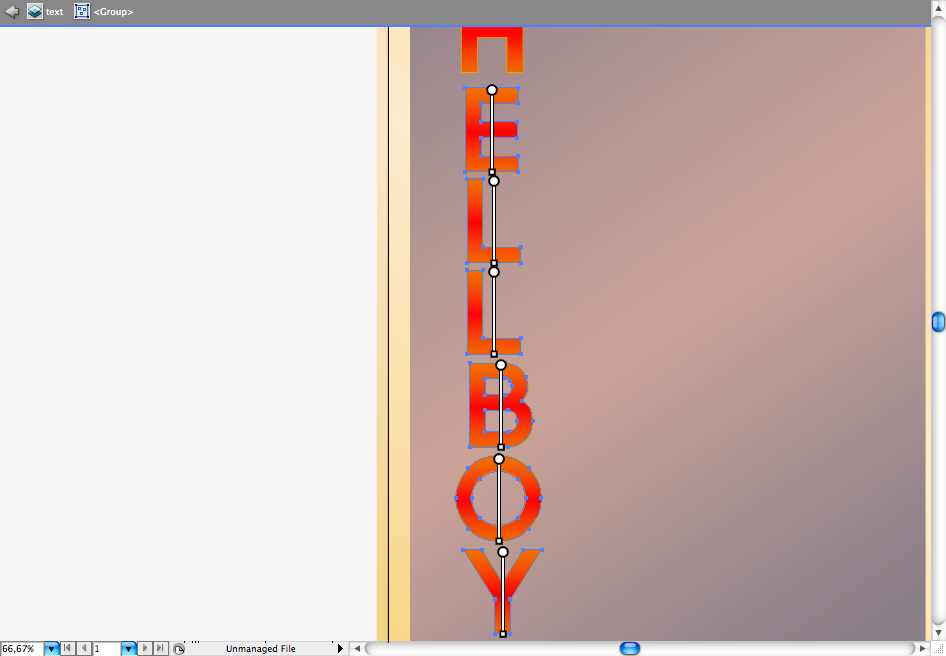
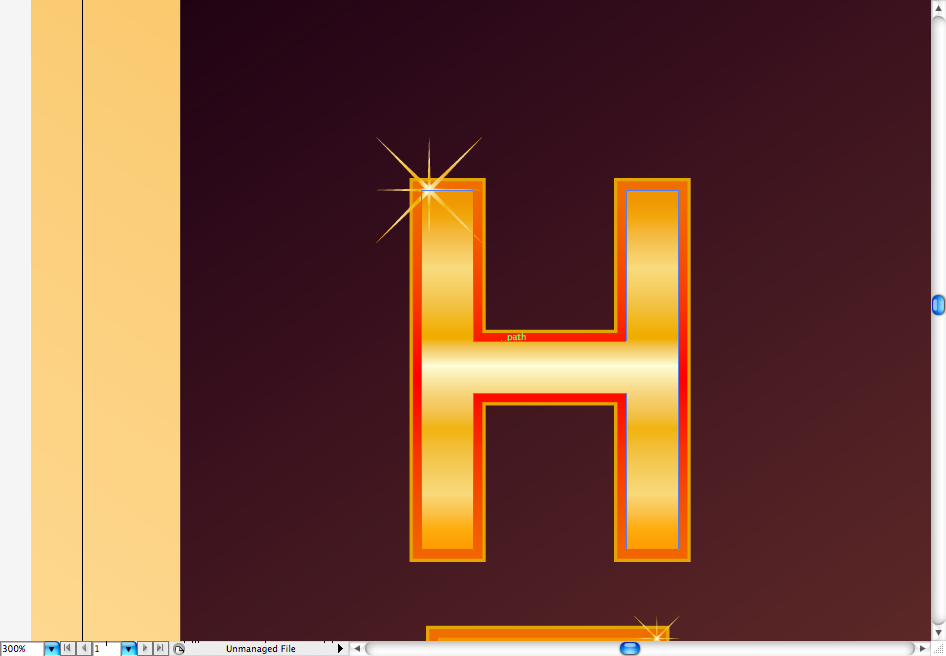
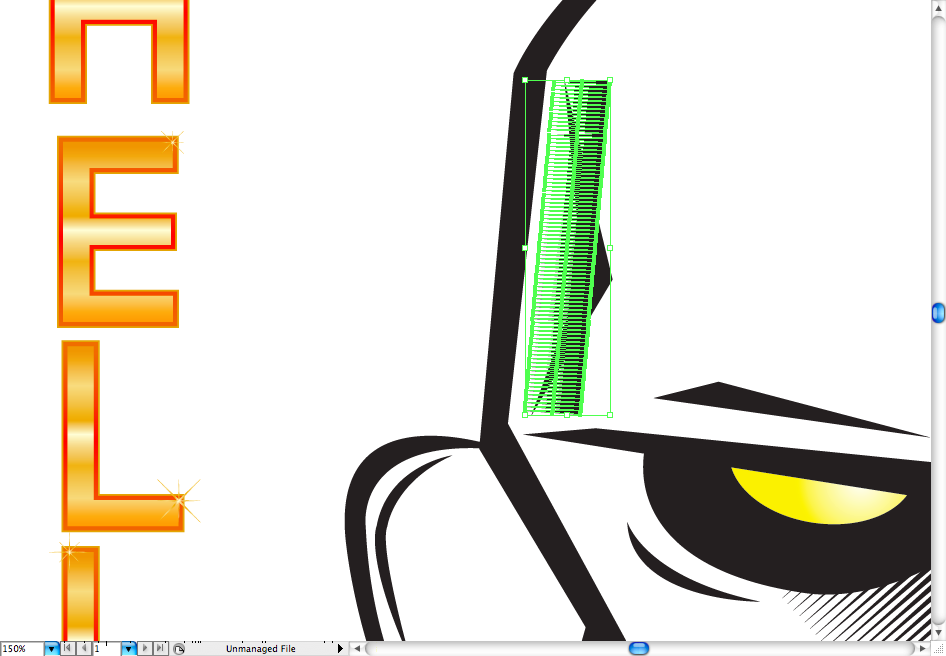
Step 2I used the Code font with bold, you can get it at Font Fabric. Create a new layer ( ctrl + L / command + L ) for the text, type "hellboy" and create outlines, then align it vertically using the align panel option called horizontal align center.
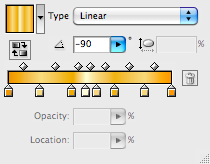
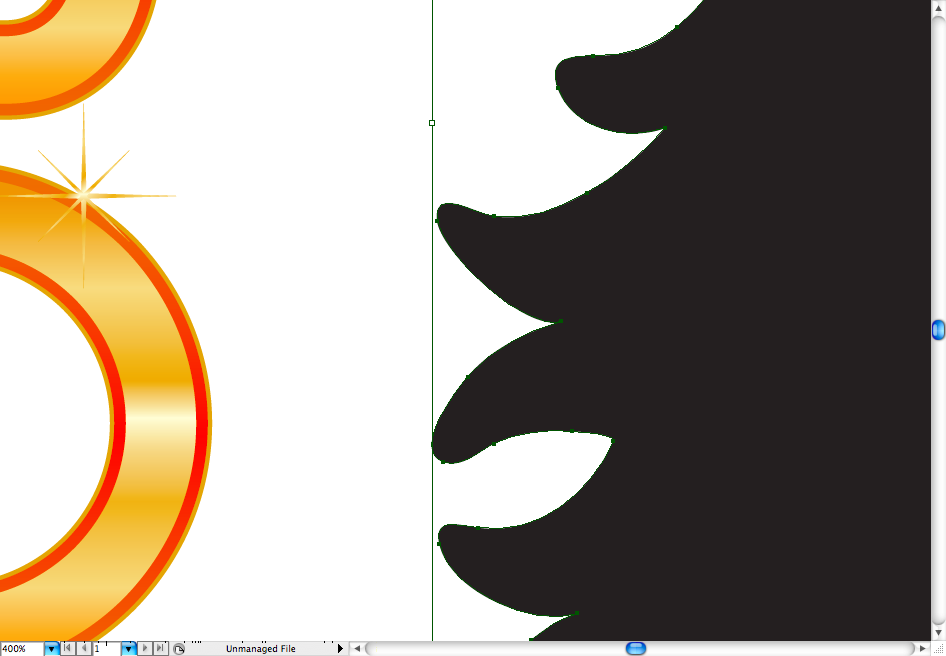
Using the gradient tool ( G ) create this mettalic gold gradient (it should take you some time to adjust correctly) in each letter.
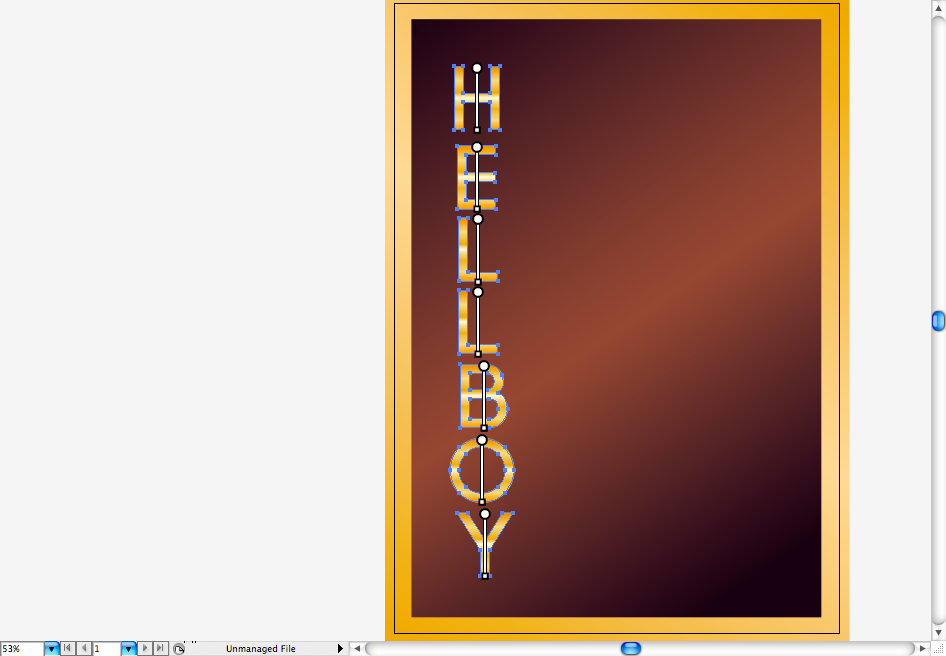
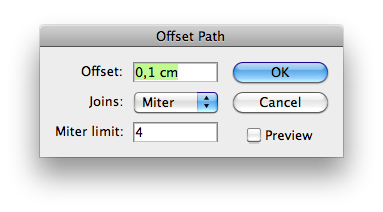
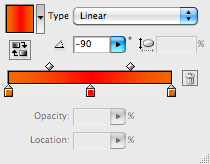
Now go to Object > Path > Offset Path and set Offset to 0,1 cm , miter Joins and 4 limit miter. Using the gradient tool ( G ) create this red gradient and add a dark yellow stroke on it, send it to back and you should get this result.
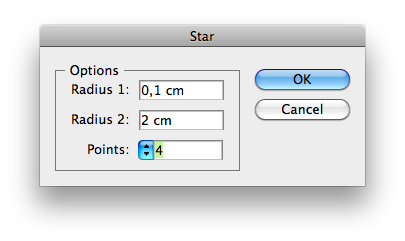
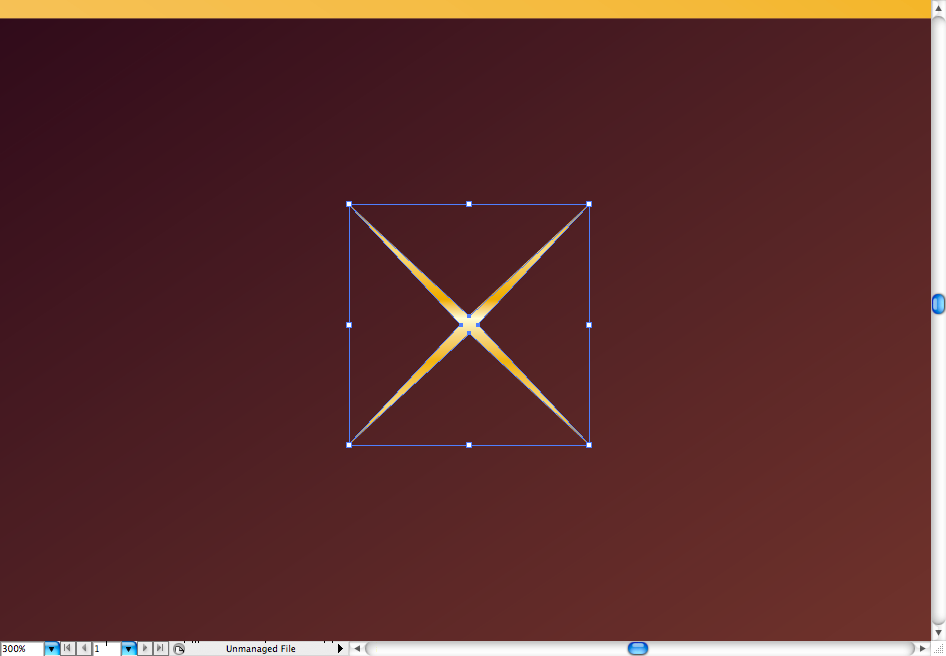
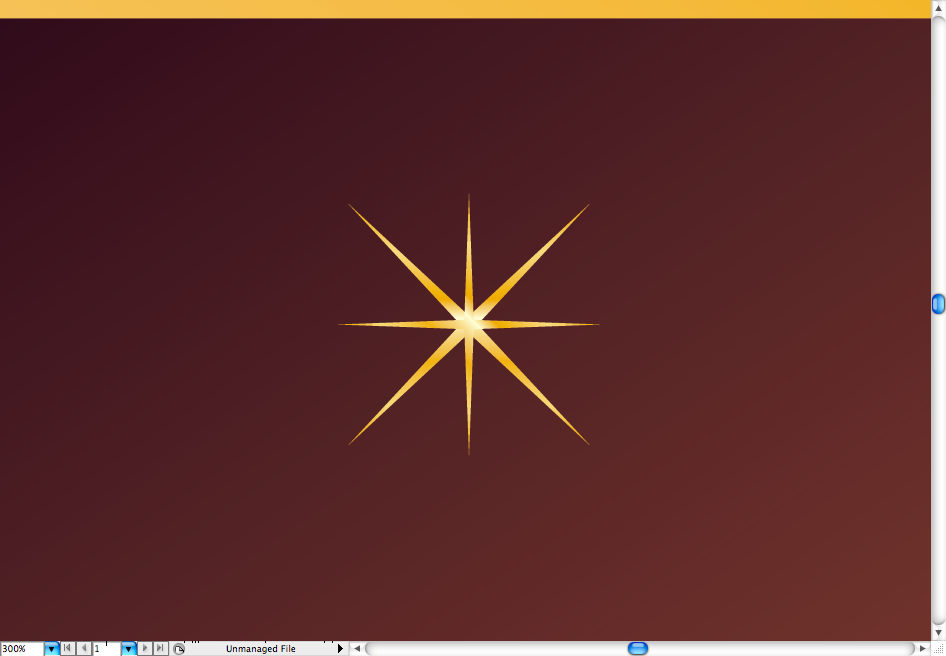
Finally, let's add some fine detail on the type, using the star tool create a slim star with 4 points, radius 1 with 0,1 cm and radius 2 with 2 cm. Duplicate it using the selection tool ( V ) + alt then rotate it and resize it. Distribute it along the type on it's corners to give some fancy look.
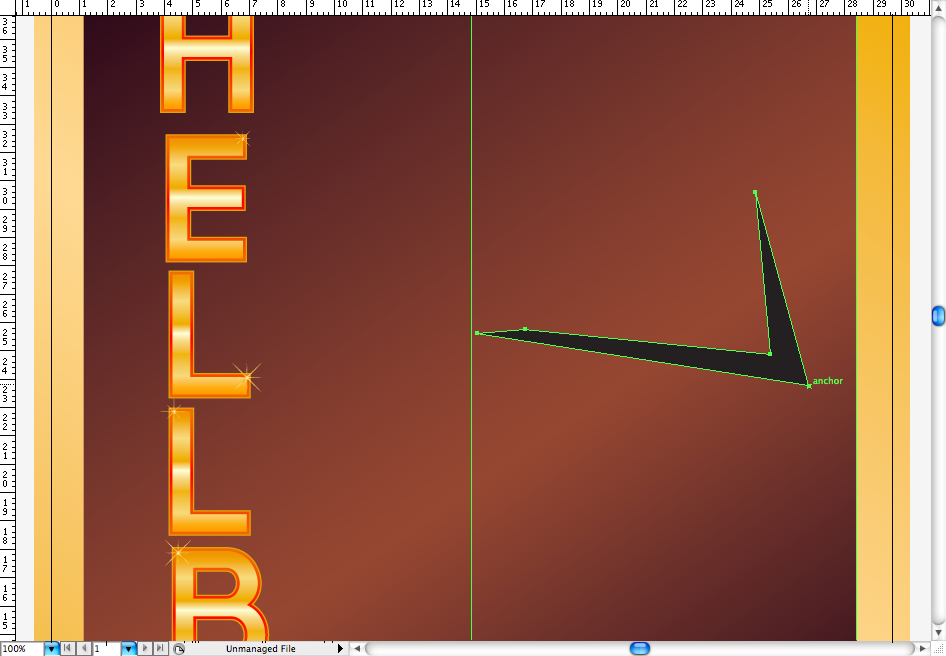
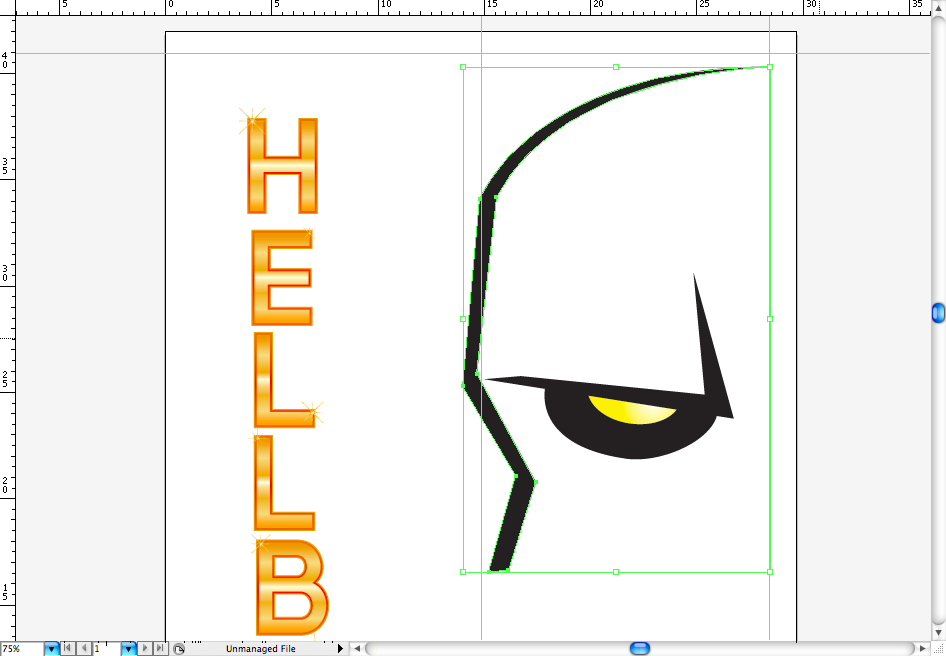
Step 3Well, let's skip to the illustration part, first of all, you should create 4 guides to help you don't exceed the area of the poster we're going to use. So create a new layer ( ctrl + L / command + L ) and create the 4 rules by using ctrl + R / command + R, pull the guides and posicionate like the sample bellow..
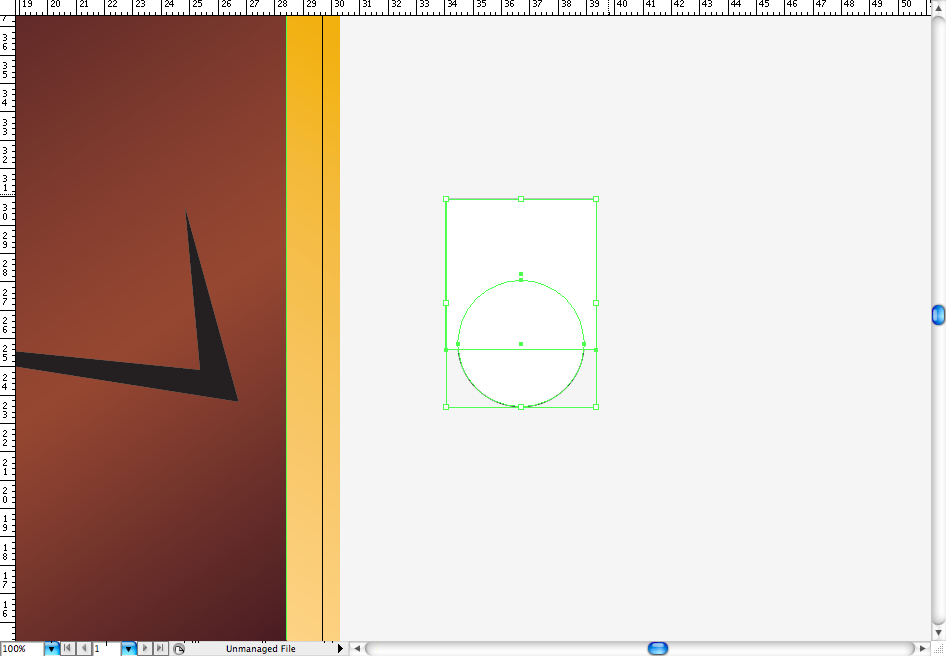
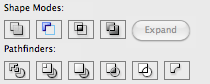
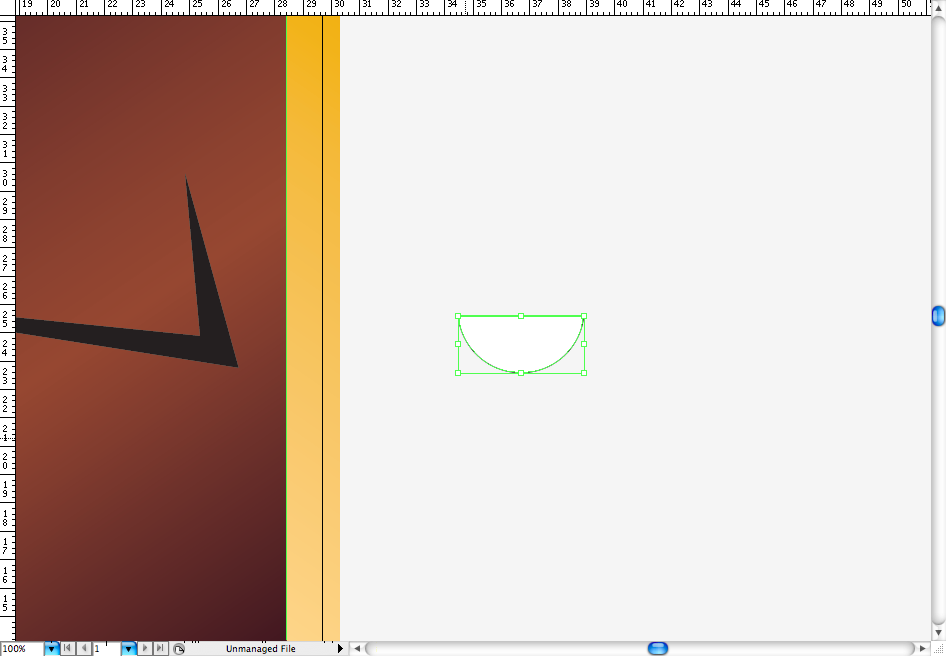
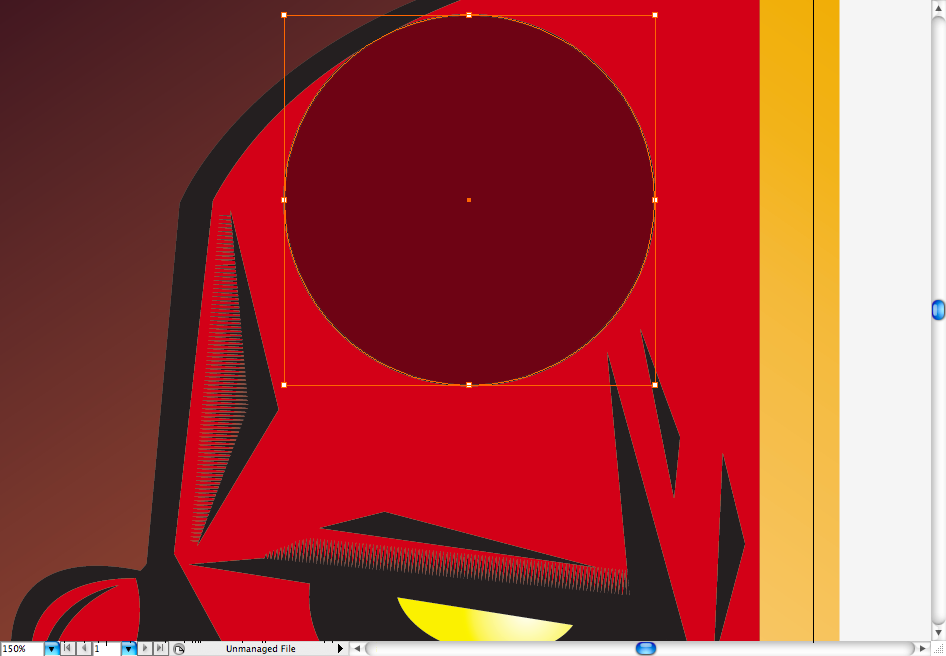
Let's begin with the eye, create this shape by using the pen tool ( P ) , it will be the eyebrown, than create a circle using the ellipse tool ( L ) and a rectangle using the retangle tool ( M ). Place the rectangle above the circle and align the bottom of it to the center of the half circle. Access the pathfinder panel and choose the option called minus front, this should create this half circle.
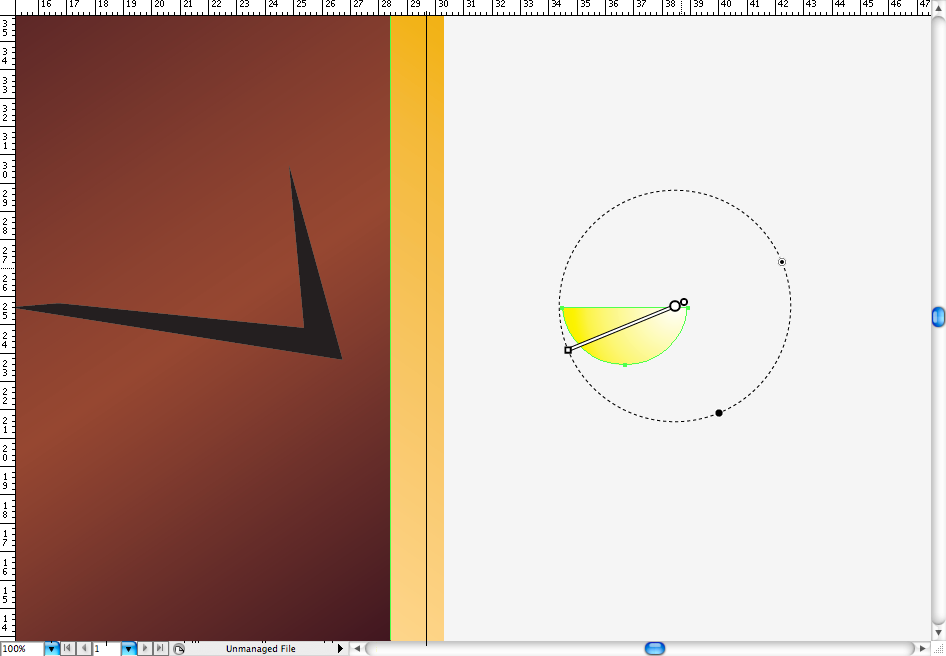
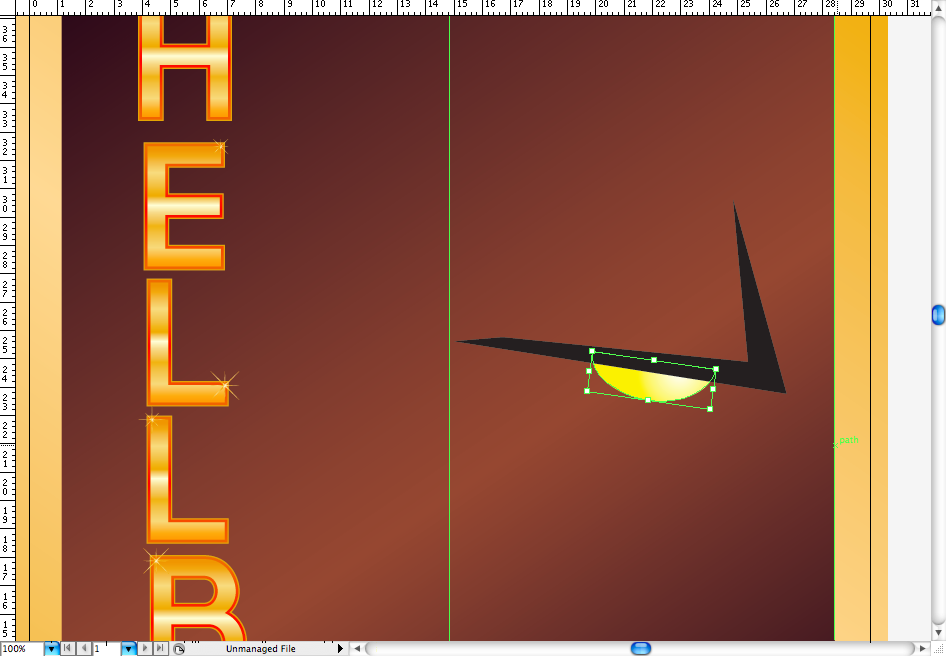
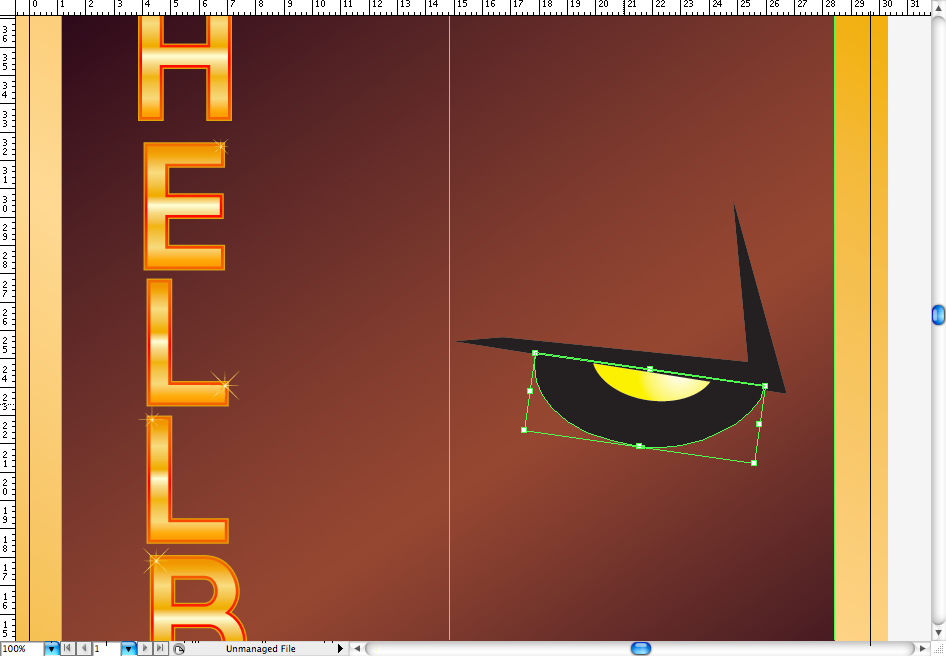
Usign the gradient tool ( G ) create a light yellow radial gradient on the half circle. Now posicionate it and resize it above the eyebrown in order to look like a eye. Duplicate the half circle using the selection tool ( V ) + alt , change it fill to black, send it to back and resize it and posicionate it till it loo like the sample bellow.
Step 4Now let's try to draw the rest of the face, first of all hide the two backgrounds, the white canvas is way better to work. Using the pen tool ( P ) create this shape that will be the top of hellboy's cranium. With you have a tablet you may find it more easier to do it with the brush tool, then just expand it and adjust to look like this, fell free to do the way you find more easier.
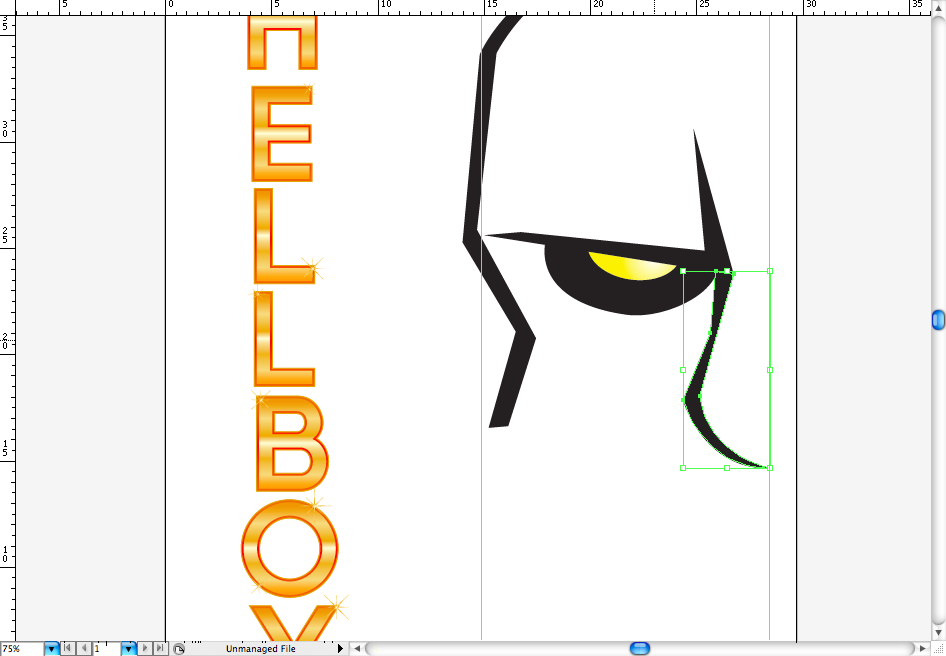
Repeat the same procedure, but draw it's nose this time.
Try to draw a big mouth like this to give it more like a gorilla look.
Finally draw it's ear, that sould be the easiest part, the basic part of the face it's now complete, let's skip to the details.
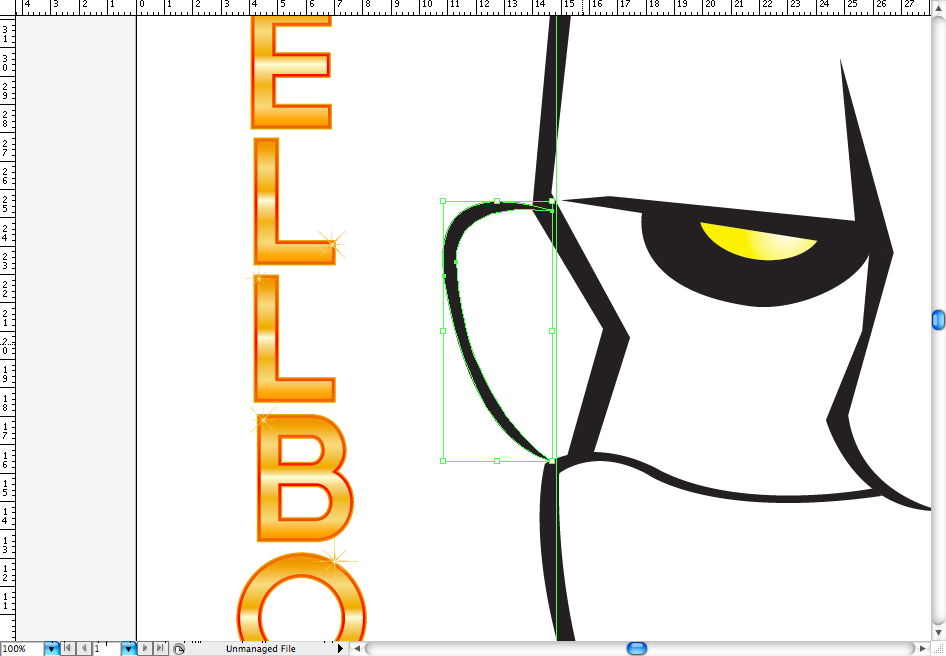
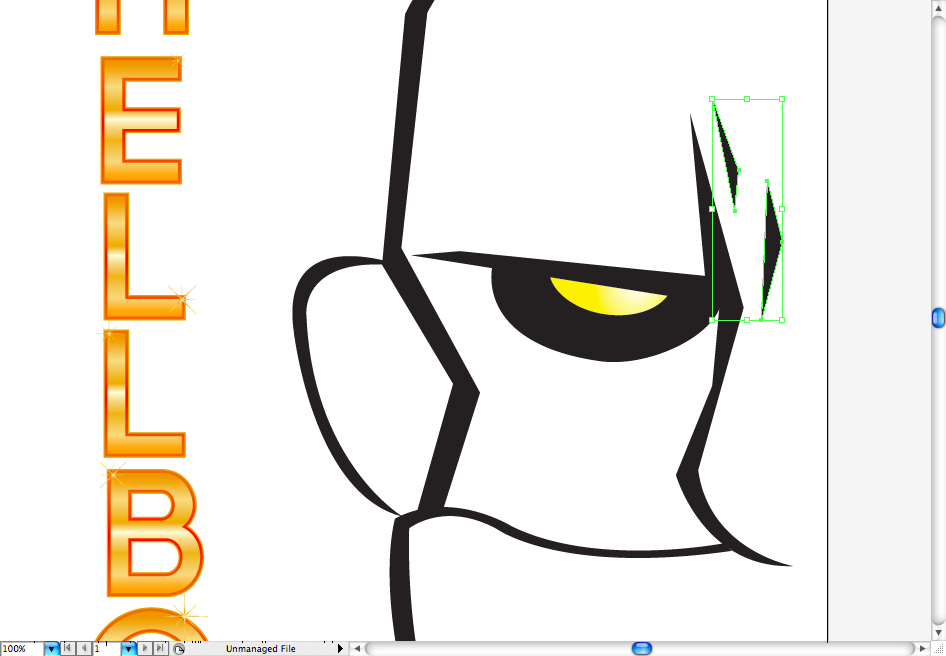
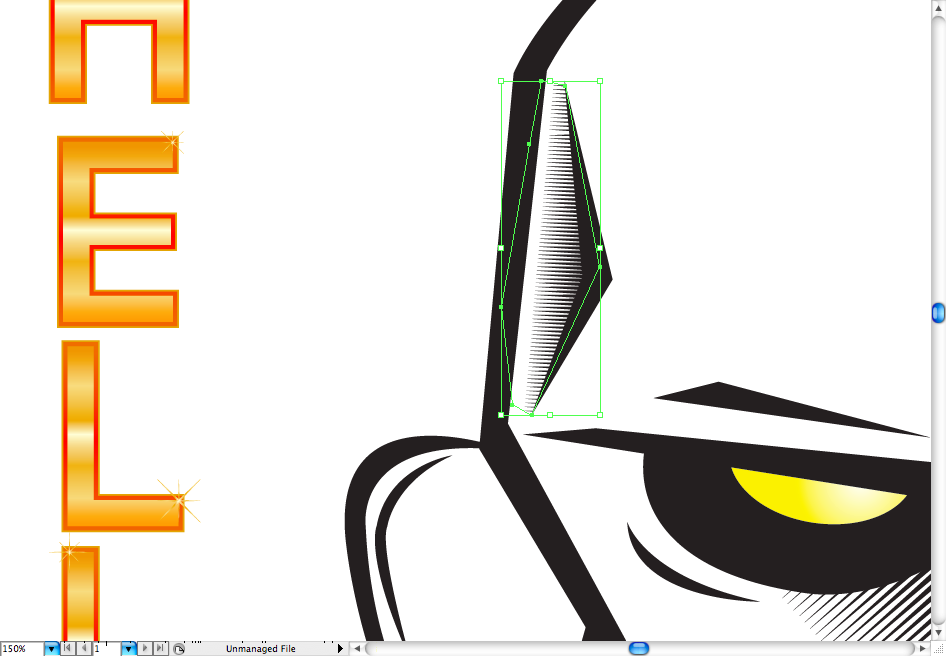
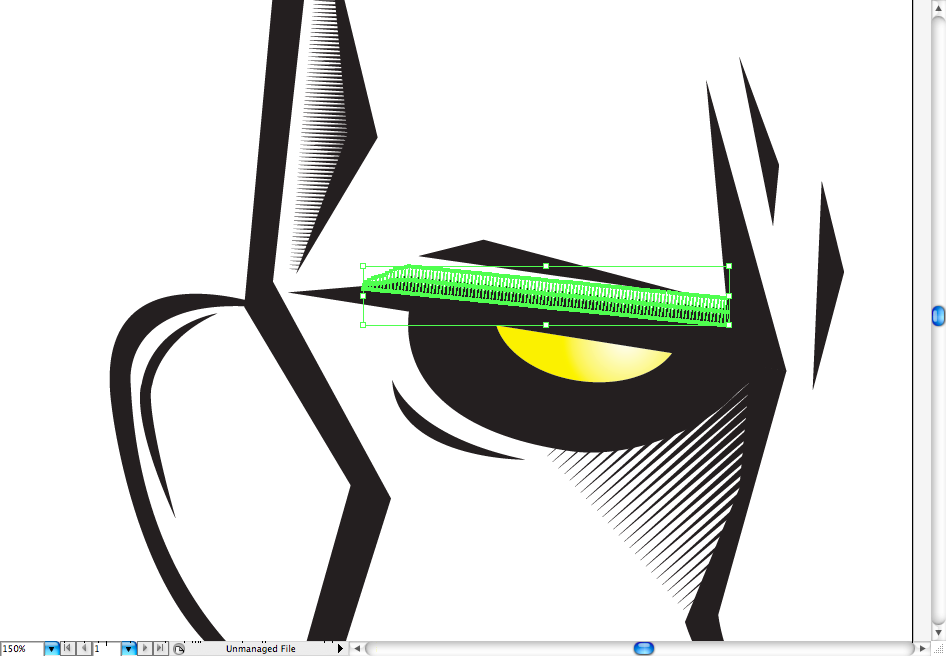
Step 5Let's add some details to the face, using the pen tool ( P ) create simple shapes like this to look like wrinkles, create it above the nose, on the ear, above the eyebrown, bellow the eye and in the head side. This will give a more bad guy's look.
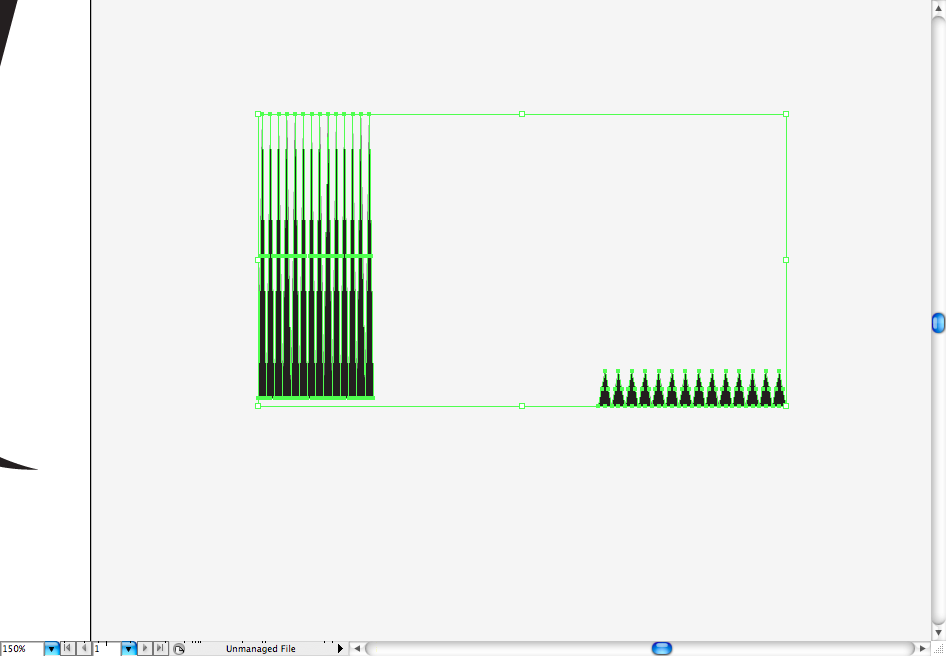
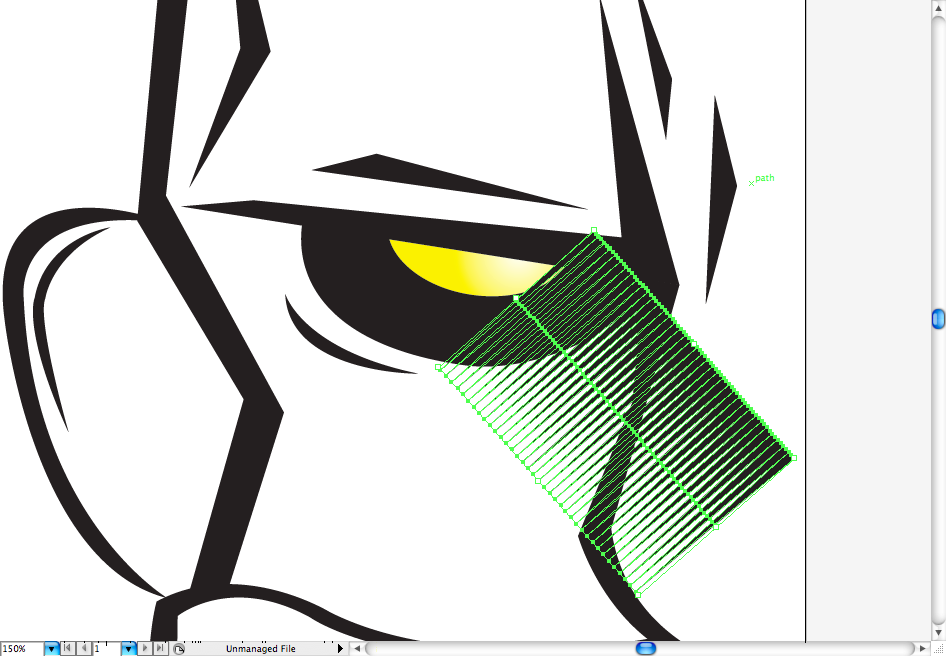
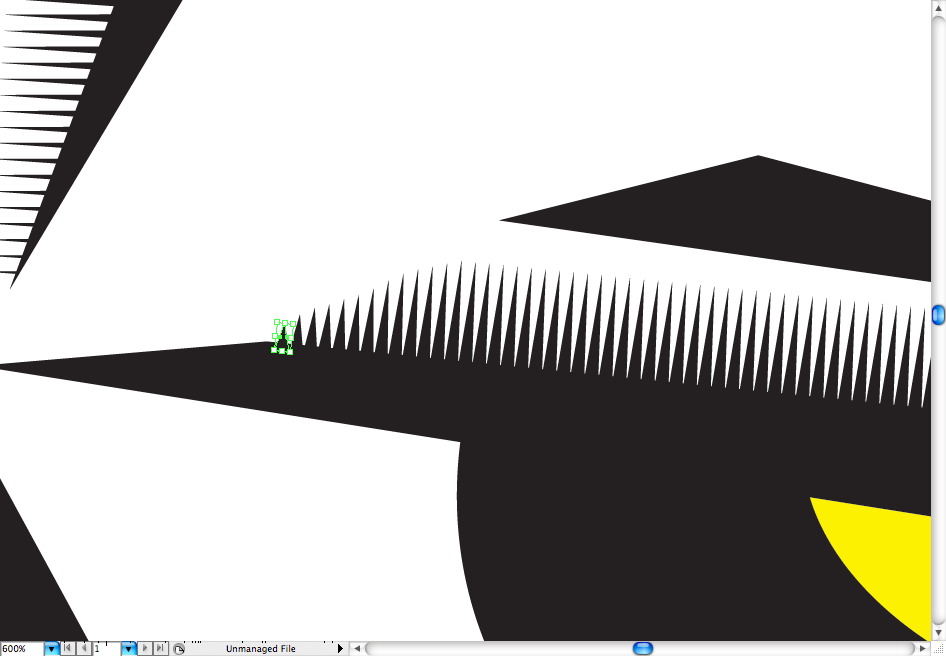
Here's a little trick I've learned watching Hydro 74 works: create a series of triangles and resize it, posicionate it to the part you wanna make the hachure and give more depth.
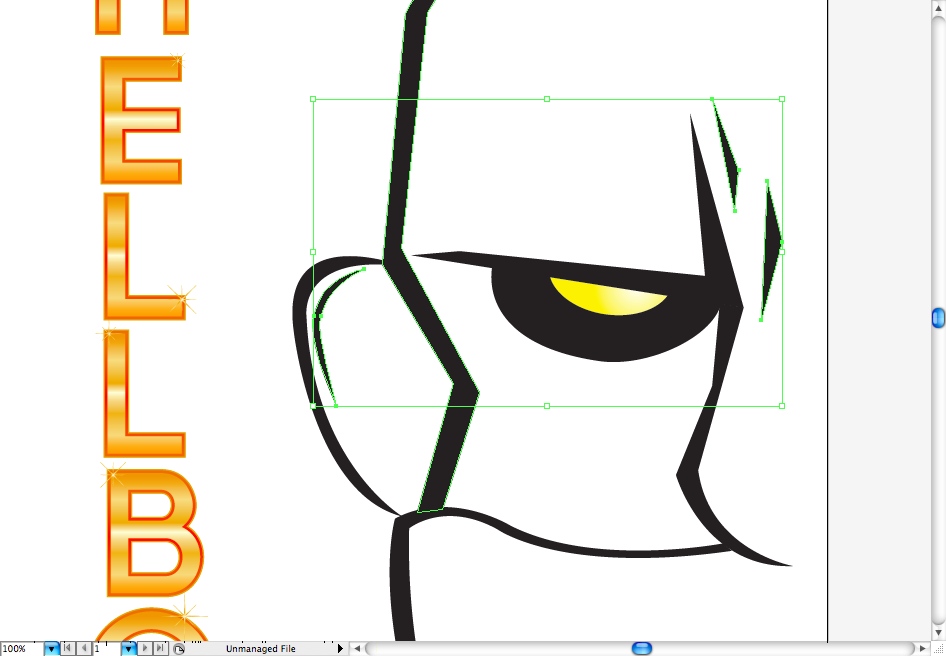
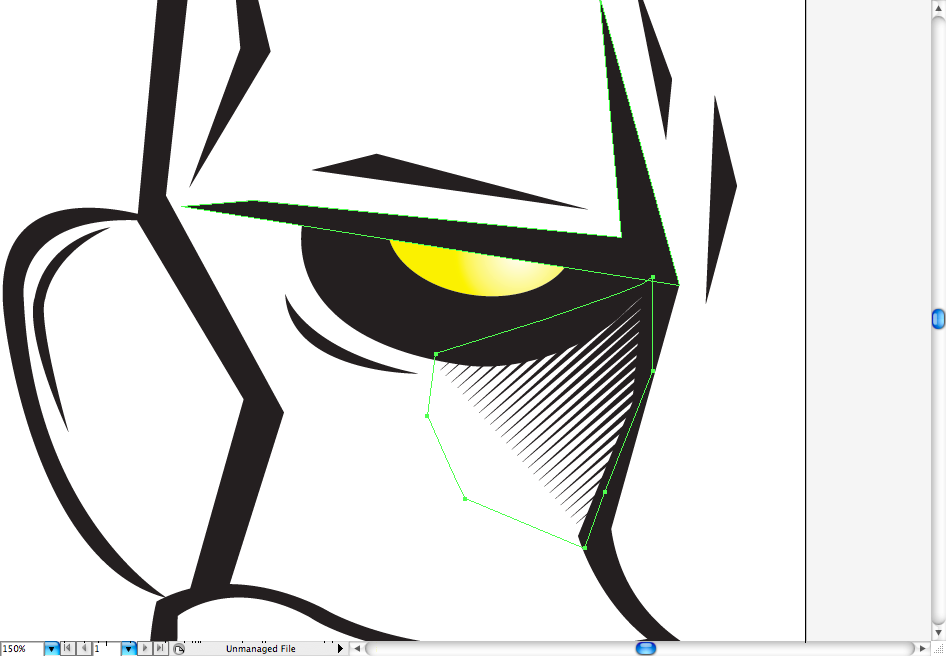
First add this hachure to the space between the eye and the nose, with a little help from the pen tool ( P ) create a clipping mask ( ctrl + 7 / command + 7 ). Repeat the procedure on the wrinkle on the left side of the head.
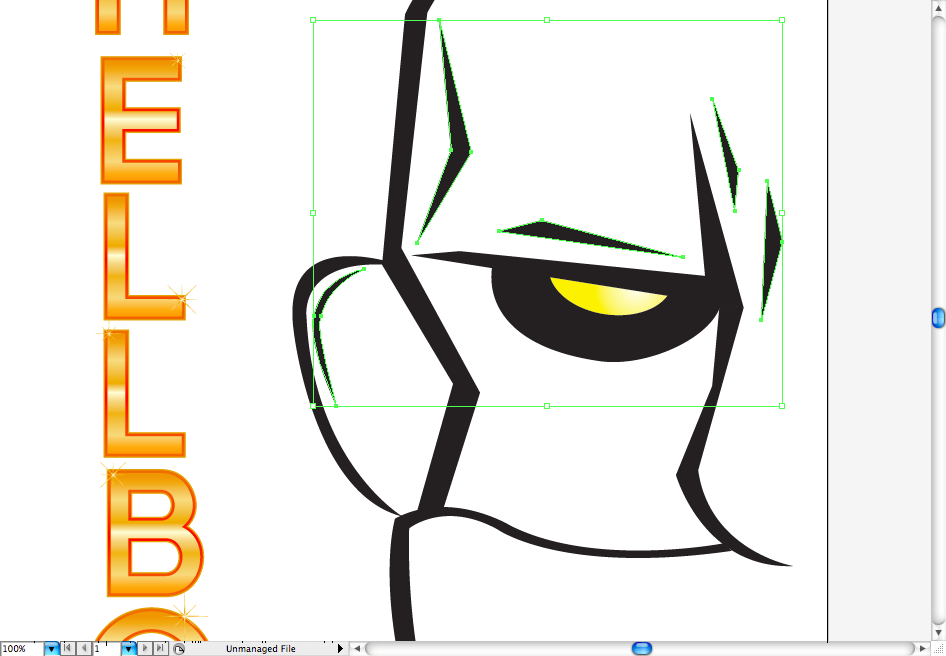
On eyebrown you won't need to do a clipping mask, but you will have to resize it. It also needs some fine adjustments that you will have to do manually, like the decrease of the triangles.
Make the wrinkles of the mouth by using the pen tool ( P ) and duplicating it with the selection tool ( V ) + alt . The final result should be something like these.
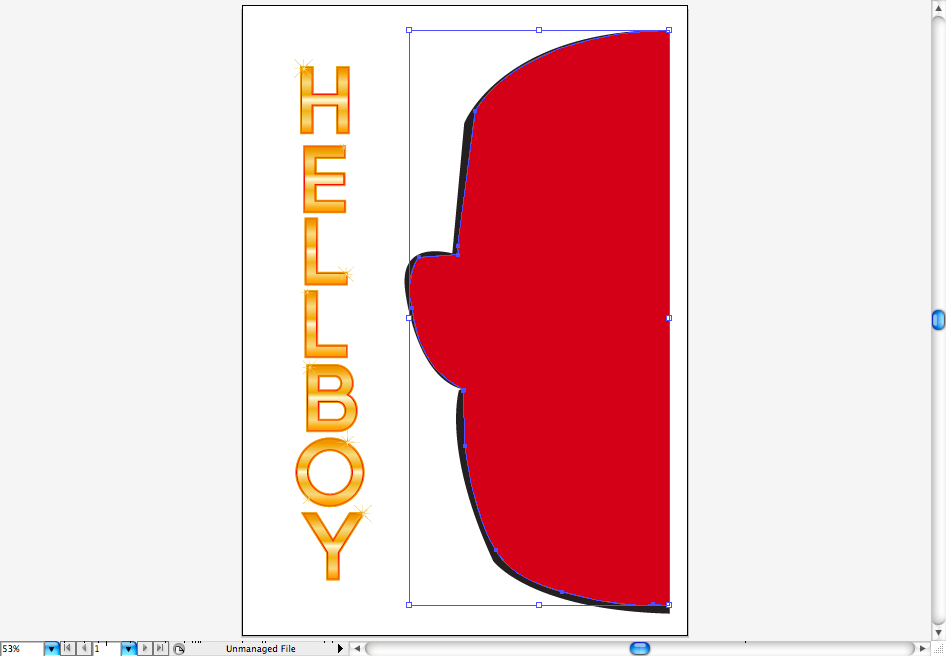
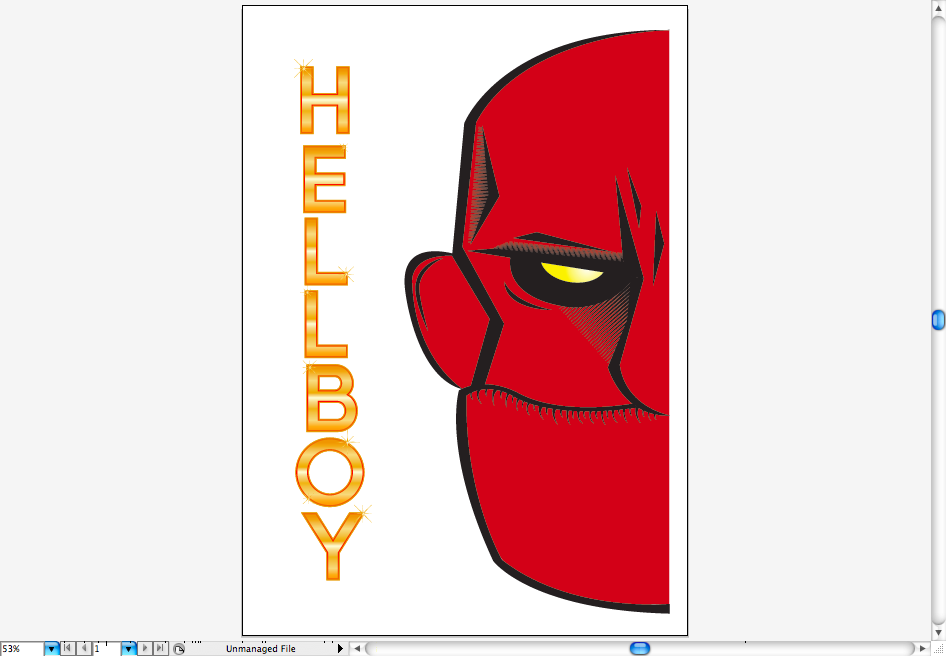
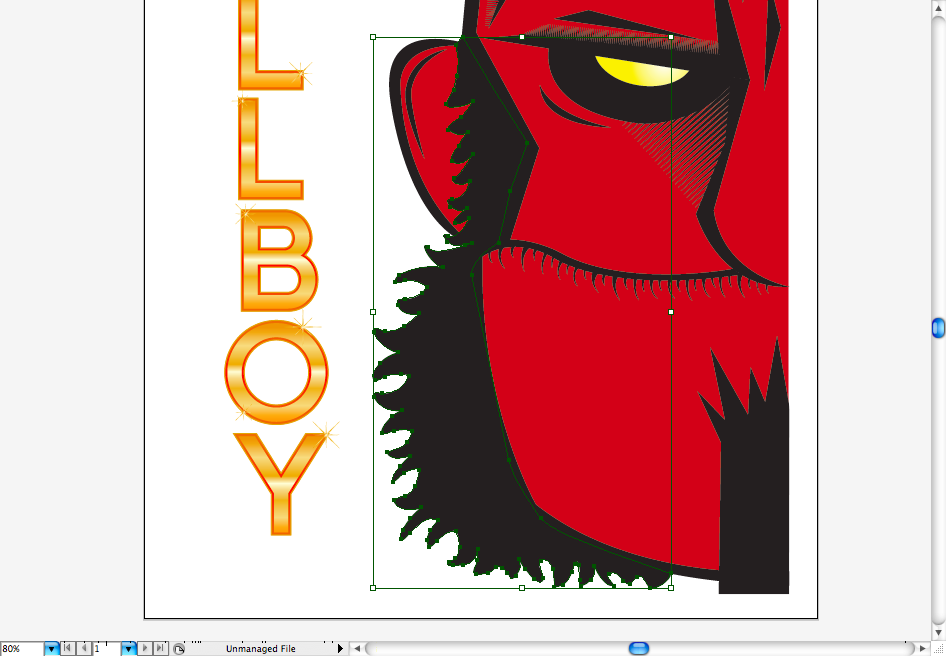
Step 6This is probably the easiest step, using the pen tool ( P ) you're going to create a red fill around the head. Create a new layer ( ctrl + L / command + L ) and bring it to back, it's better to make the fill separated from the trace because when you need to texturize it will be a lot more easier as you going to see next.
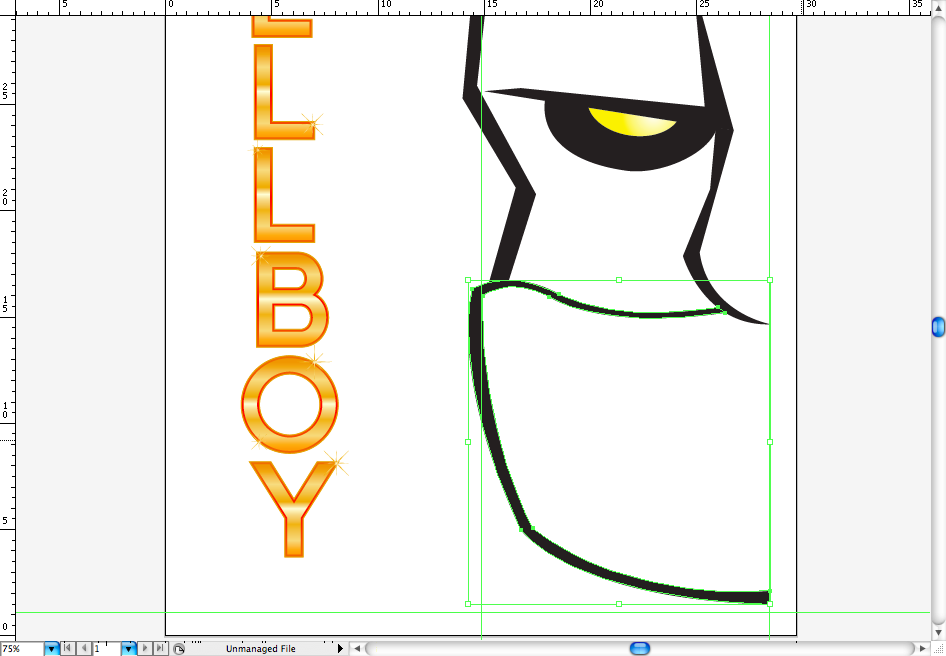
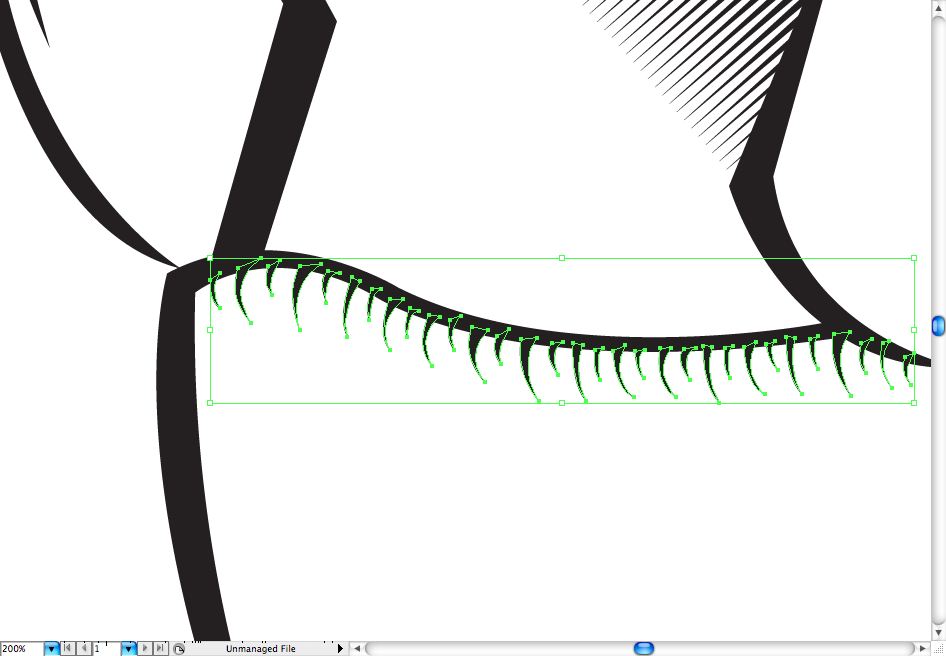
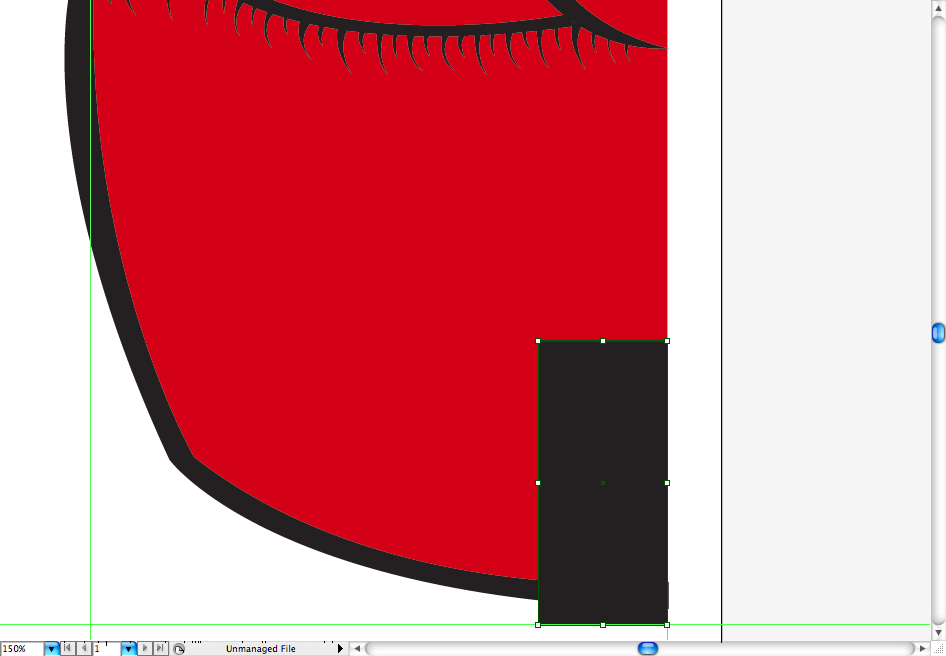
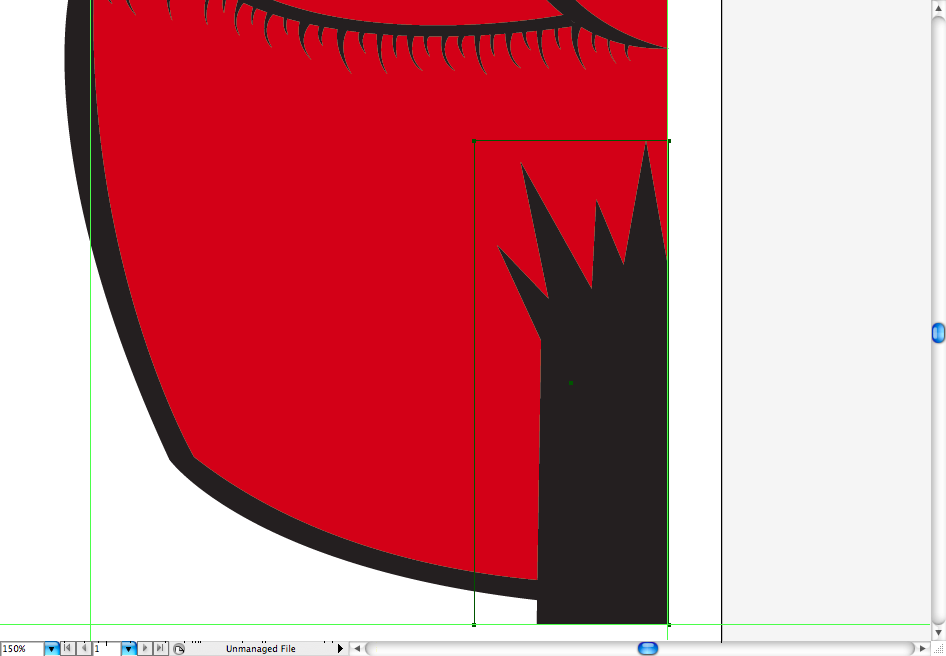
Step 7The Hellboy beard is really weird, as you can see here. First we're going to draw the goatee, pretty simple, just make a rectangle with the rectangle tool ( M ) and using the pen tool ( P ) add some triangles on it's top.
Unfortunately, there insn't another way to do the beard except by using the pen tool ( P ), after it use the smooth tool on it, in order to look less sharpen.
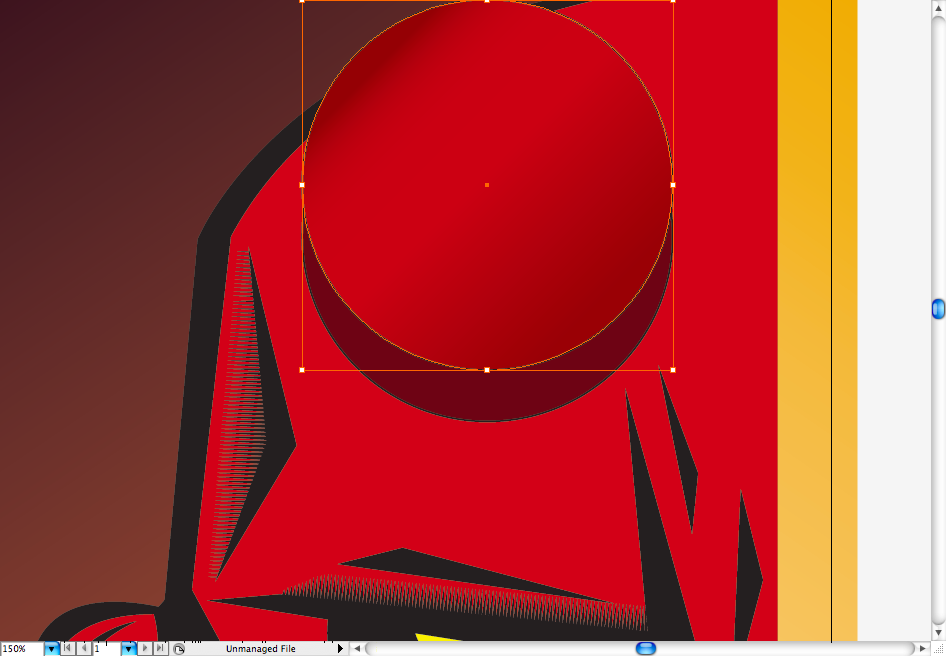
Step 8Hellboy just isn't Hellboy without his cutted horns, so let's draw it, now you can activate the background hidden layers. Create a circle using the ellipse tool ( L ), choose a dark red fill and then duplicate it using the selection tool ( V ) + alt , change the fill of this one to a light red gradient and place it above the darker one.
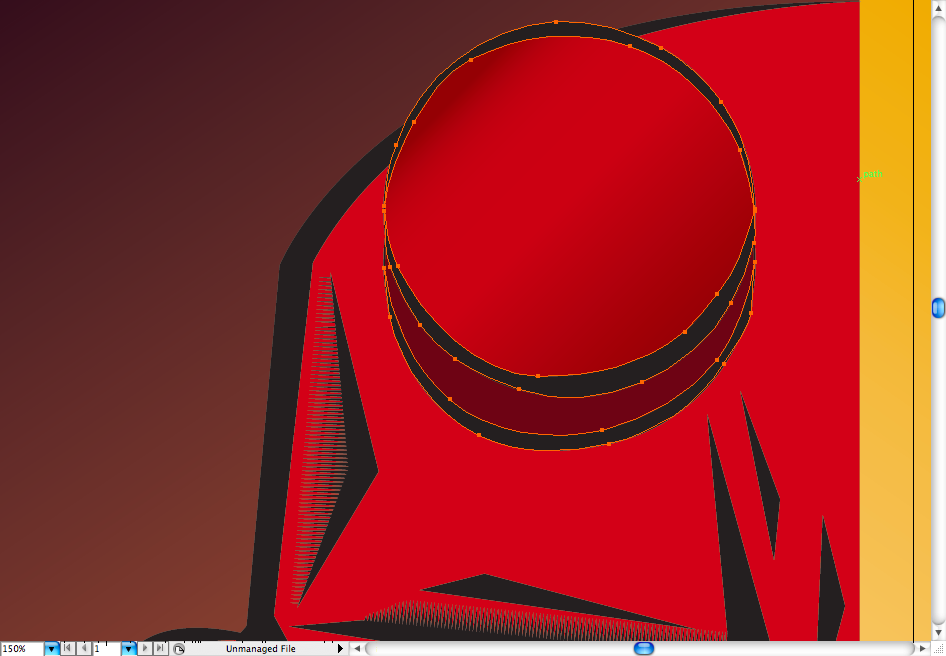
Usin the pen tool ( P ) create this lines to look more like the rest of the face trace.
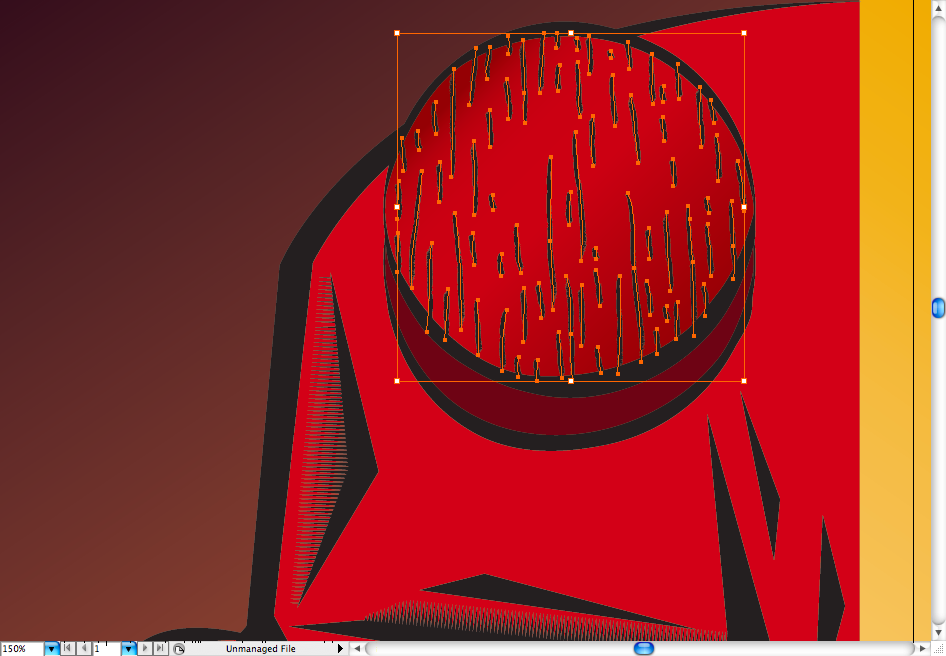
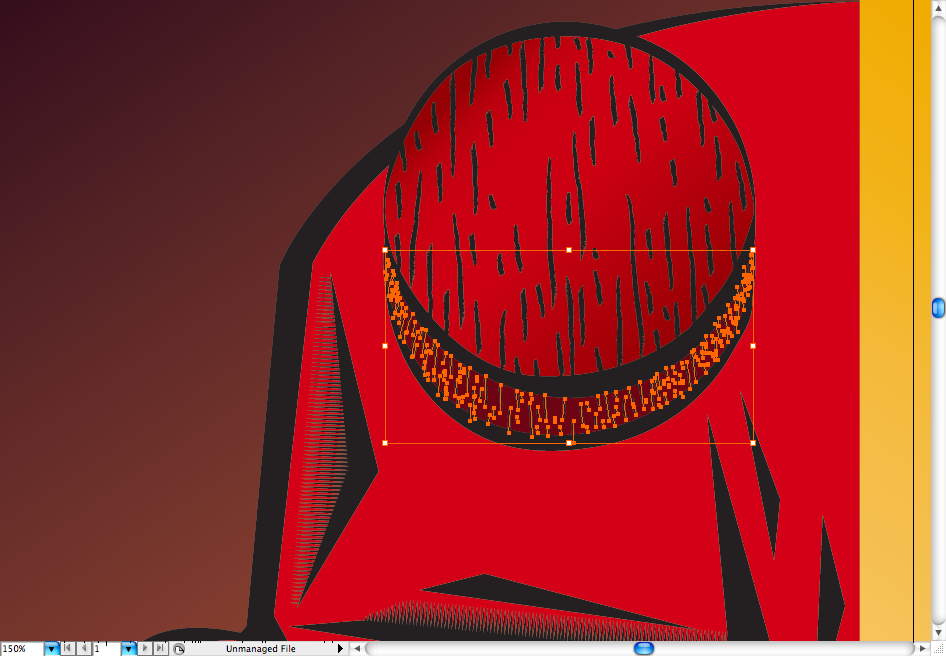
Using the brush tool ( B ) create these little lines to give a more solid aspect to the horns. Well, the main illustration it's done, in the next steps where going to texturize it.
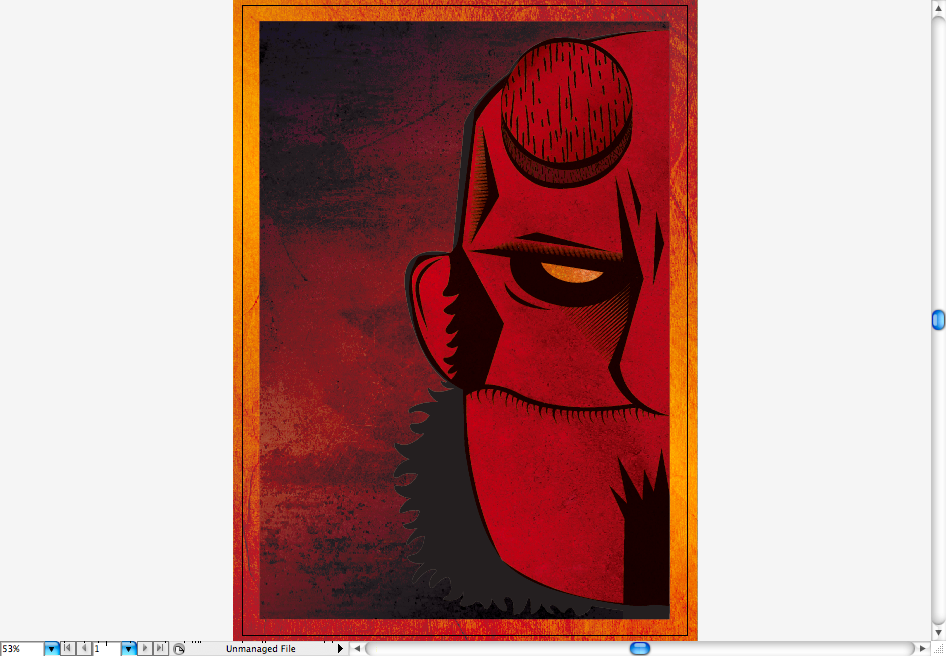
Step 9There's many ways to texturize this illustration, while doing some experiments I've found that is way better to texturize all the elements separated than just putting a texture above all the picture. You can find some realy cool texture here at Abduzeedo, on the Tuesday Total Texture pages. First texturize the gold background, then the brown background and make a clipping mask ( ctrl + 7 / command + 7 ) on a texture to fit only the Hellboy's face. I rather leave the text with no textures, but feel free to use with you want.
Layers Order
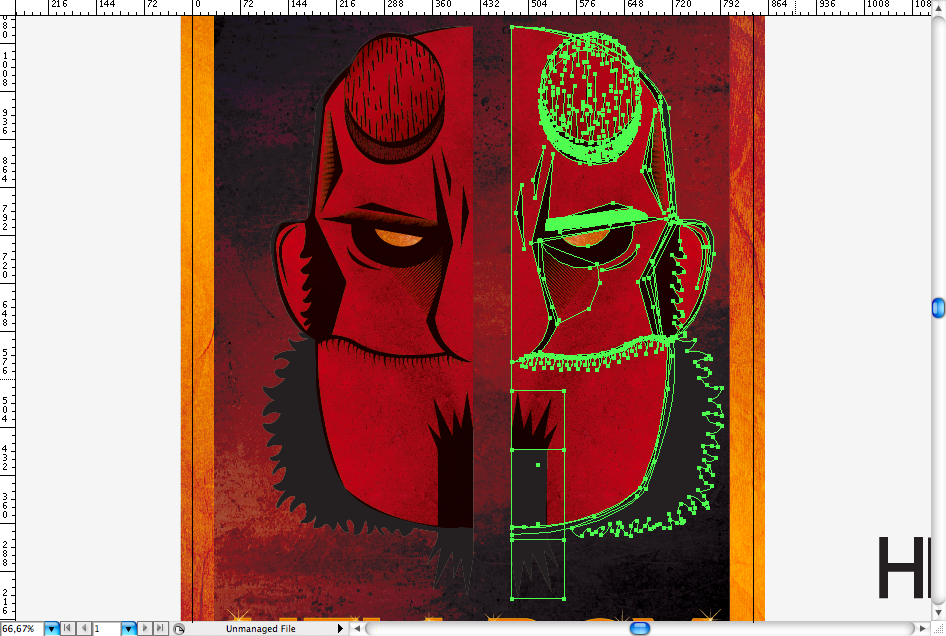
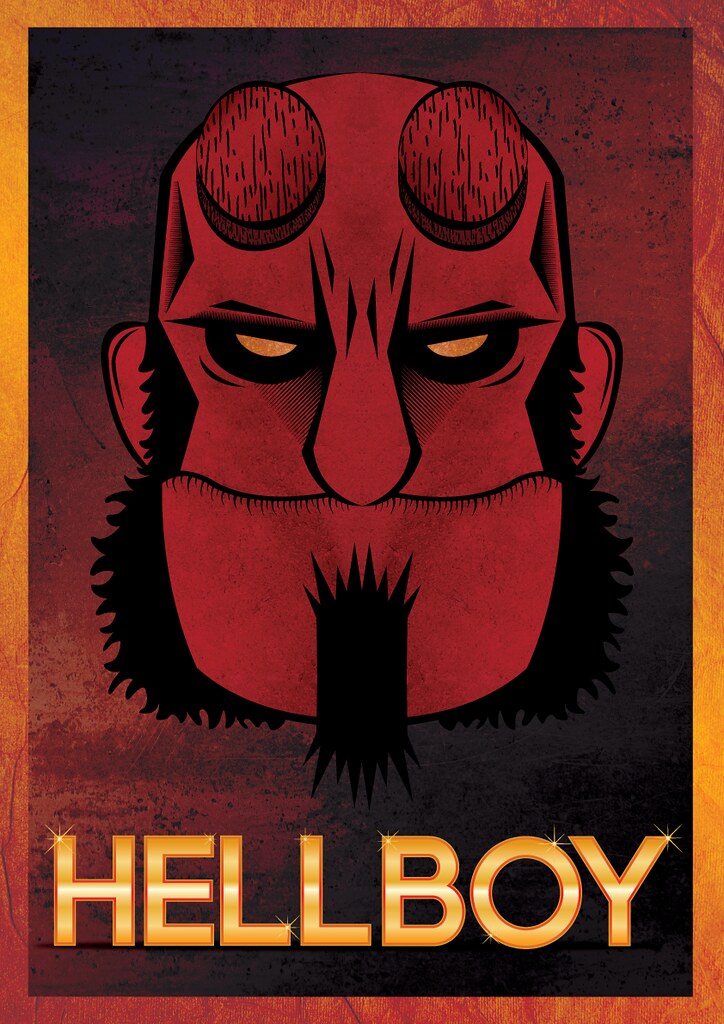
Step 10But with you're not happy with the final result yet, you can just do a little trick and copy the Hellboy's face and reflect it, then you should get this:
Final ConclusionHope you enjoyed this tutorial and learned some illustration tips guys, don't get worried with it don't get exactly as the original, try to do your own version too and experiment other ways to achieve the final result. Download the filesCLICK HERE TO DOWNLOAD ALL FILES USED FOR THIS TUTORIAL |
| Posted: 24 Jan 2011 04:00 AM PST
We've seen some great gadgets and equipment for designers. So many cool stuff, that we could actually assemble infinite perfect office spaces! Every week we'll assemble a perfect office, and we'd like you to help us. What equipment would the perfect office have?<!--break--> Not only gadgets and equipment, but also furniture, sound system, gaming stuff (for lunch time!). A designer is totally allowed to dream with the perfect office, and that's what we're gonna do here! Also, tell us your suggestions, or even better, you may tell us via twitter (mine and fabio's), using #abdz_ofc so we can check it. Alright? I hope you guys enjoy this brief selection. Cheers! ;) Face Mug Put a smile on that mug with a hungry mouth cubby that bites off more than you can chew. (at 7 Gadgets) Typography Furniture Furniture that integrates Typography into our Daily lives. Simple yet effective. (at Design Spotter) Eton Mobius f you can still see the sun where you live, you could be charging your iPhone with its power thanks to the Eton Mobius. This battery pack/case/solar charger is custom cut to fit your iPhone 4, and features a battery large enough to double your iPhone's runtime, a rear-mounted monocrystal solar panel, open access to all ports and controls, and a jeans-friendly form factor that won't necessitate bringing a bag along with you. (at Uncrate) Linksys E4200 dual-band router Cisco's new dual-band 802.11n rig enters a high-end market segment currently occupied by the TRENDnet TEW-692GR. Both routers utilize a 3x3 Multiple Input Multiple Output (MIMO) configuration for a max throughput of 450Mbps on the 5GHz band, and while the E4200 only reaches speeds of 300Mbps at 2.4 GHz (as compared to the TEW-692GRs 450Mbps) it should still be quite the video streaming powerhouse. As we've seen in previous Cisco offerings, the company's latest has USB connectivity and UPnP media server capabilities to add network storage and share all of your movies and music. Additionally, the E4200 packs technology similar to that seen in other routers, which allows users to prioritize bandwidth for movies, voice, or music. To keep everyone connected, it has 4 Gigabit Ethernet ports, six antennas, and several internal and external signal amplifiers to provide coverage for even the most palatial of estates. (at Engadget) BenQ LED Monitors BenQ's monitors may have all come from the same glossy black plastic mold as of late, but the company's stepped things up a bit for its new 24-inch EW2430 and EW2430V "Vertical Alignment" LED monitors, which pack some high-end specs and some more refined looks to match. Chief among those specs is the VA LED panel used in each monitor, which promises a native 3,000:1 contrast ratio, minimal light leaking, an improved viewing angle, and a true 8-bit color range, among other benefits. You'll also get a full range of ports (including two HDMI and four USB on each), a pair of 2W speakers, and some added features like "Smart Focus," "Super Resolution," and "3D Noise Reduction" on the EW2430V model. Still no word on pricing, but you can look for both monitors to hit Europe and the Asia Pacific region this month, with a worldwide release set to follow sometime thereafter. (at Engadget) |
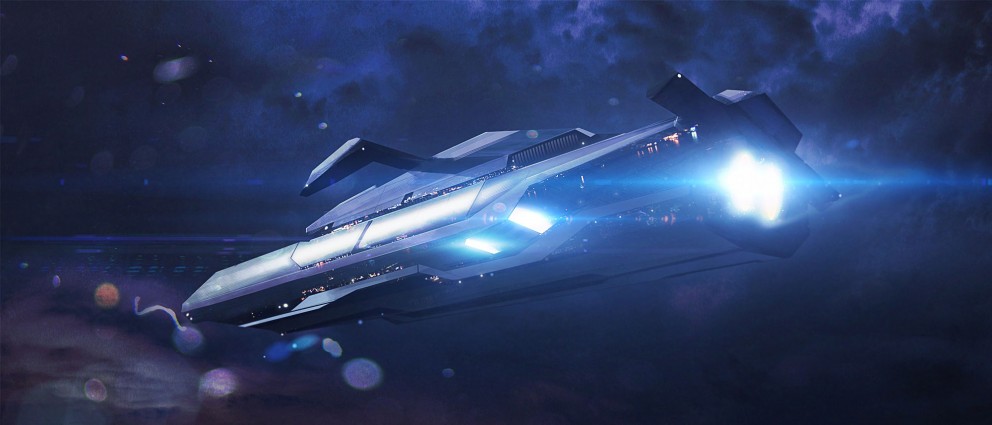
| Posted: 23 Jan 2011 09:40 PM PST
The Depthcore Collective one of our favorite ones out there has just released their new chapter, the 41st themed chapter exhibition called "MIRROR". As you can expect there are amazing works from masters such as Justin Maller, Sara Blake, Mike Harrison, Jeff Huang, João Oliveira and many others.
Perspectives Exploration 01 © Sara Blake
Perspectives Exploration 03 © Sara Blake
Swallow © Ehren Mikeal Kallman
Amo La Vita © Mike Harrison
Farewell Mr.Eldritch © Matei Apostolescu
Supernova © Richards Roberts
Empyrean © Justin Maller
I, the accuser © Matei Apostolescu
Pestilence © Jeff Huang
I Tweet © Phil Dunne
Neo Eden © Kervin Brisseaux
M?RM © Maciej Hajnrich
Mirror House © João Oliveira
§ © Sougwen Chung
For more information about Depthcore Collective visit http://depthcore.com/ and to see more works of the MIRROR chapter go to http://depthcore.com/chapter/Mirror/ |


| You are subscribed to email updates from Abduzeedo | Graphic Design Inspiration and Photoshop Tutorials To stop receiving these emails, you may unsubscribe now. | Email delivery powered by Google |
| Google Inc., 20 West Kinzie, Chicago IL USA 60610 | |
Tidak ada komentar:
Posting Komentar